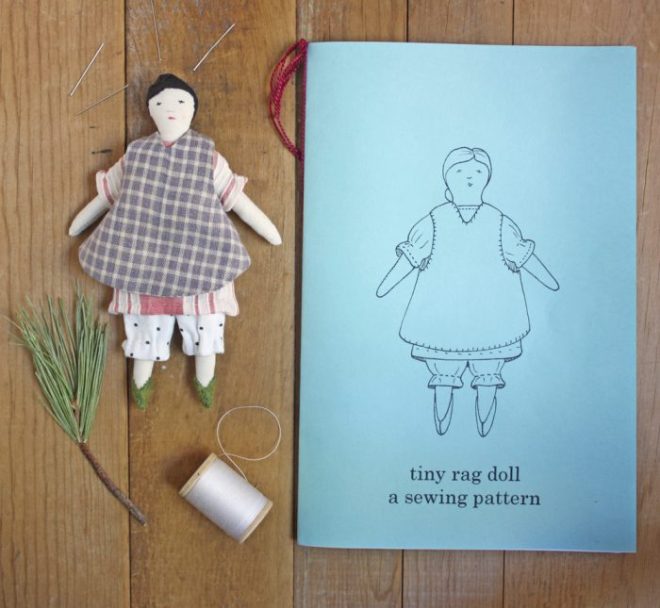
Tag: sewing pattern

good and simple lamb folk

mr. and mrs. lamb

mr. and mrs. lamb

mr. socks : sewing pattern


Patched and mended, a little worse for wear, but good and happy sheep, sheep who persevere. I made mr. and mrs. lamb from the mr. socks pattern with just a couple little modifications. Their outfits and the satchel are made from the tiny rag doll clothing and wardrobe patterns with modifications detailed here.


The only changes are to the head. I made ears  – gray on one side and black on the other – stitched with the right sides together. I left the last half inch open for turning right side out.

You can grab a template for those little pieces here.


I closed the opening, whip stitched around the seam and then stitched the ears to the head. I cut a little circular head cover instead of the pointy mr. socks head cover.

I pinned the head cover in place and stitched over the ears and across the front. I added a tiny bit of stuffing before closing the back so his head would be smooth.
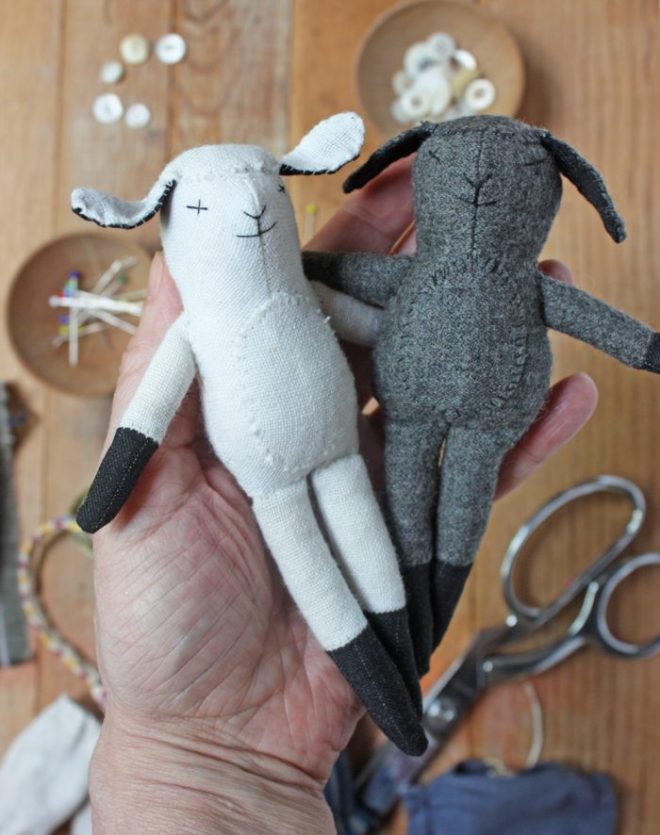
lamb ragdolls

Here they are all sheepified – mrs. has got some seriously happy ears.

tiny doll wardrobe

tiny trousers

free doll pants sewing pattern


Mr. L’s tiny trousers are my favorite part – made from the super easy and free! tiny pants sewing pattern.

The little pants are quick and easy to make and easy to size up or down for other dolls. Find the pattern and tutorial here.


mr.lamb

Mr. L sports the always risky pants and scarf but no shirt look.

mr. lamb in the forest

He is off to wander among the woebegone pines.  Find the free pattern for the trees right here. And perhaps some sledding, still sans shirt…

lamb doll on a popsicle stick sled in the snow

(find the popsicle stick sled diy here)


the somewhat weekly newsletter

Do you get my free weekly-ish newsletter? There are tips and tricks, ideas, stuff to try, all the latest news and blogposts and extra stuff, just for subscribers, delivered mostly on Friday. Pretty much.


mr. socks : the print edition

 mr. socks : a sewing pattern

Mr. socks is in print!  My second print pattern is in the shop. It’s a 12 page booklet with 47 hand drawn illustrations.  I’m starting another print pattern this evening while the mechanics of putting it all together are all still fresh in my mind.  And while my drawing muscle feels strong.  I love the little booklets – they are a giant amount of work but I love making them.

 mr. socks : a sewing pattern

mr. socks takes a stroll

Maybe you’ll make a mischievous cat. Maybe he will have an adventure. I’m rolling around the idea of a photo contest for later this summer  – more on that soon.

the rutabaga pattern is here and meditative stitch for percolating ideas

rutabaga sewing pattern

It’s a relatively quick project – depending on how long you linger in the details. I’ve taught it at a workshop and fabulous turnips and rutabagas were created in under 4 hours.

stitched rutabaga applique

Personally – I like to linger in the details of these – especially the appliqué. It’s repetitive, easy, relaxing work that requires just enough attention to make it the perfect activity for percolating ideas.  Or netflix.

I make it my job to have ideas – lot’s of ideas –  and I love the sensation of letting an idea percolate, letting my subconscious have a crack at it.  I drift into pleasant, soft focus daydreamy work and behind the scenes problems get solved, perspective shifts and connections are made. A brisk walk works too but then I don’t get a lovely rutabaga out of the deal.

I also like the appliqué portion of the program because it goes against my grain a little  (a lot). I’m sometimes afraid of raw edges in a way that inhibits me creatively – I can get too obsessed with being neat and buttoning things up and lose the essence of the thing.    I’ve been experimenting with pretty traditional  appliqué (I’ll show you soon) and would like to get a little free-er in my designs.

stitched rutabaga

Besides the meditative benefits there are so many reasons to make a rutabaga (or turnip) – they are, I think, the most beautiful of the root vegetables.  No one is ever expecting a stitched turnip so they make wonderful gifts.  And these rutabagas have a secret ingredient that makes them balance in a dynamic, root vegetable-lish way.

stitched rutabaga sewing pattern

I add a little weighted fill – 1mm glass bead fill is my favorite. You can also use sand or crushed walnut shells.  I put 2-4 spoonfuls in the toe of an old pair of tights to keep it in one spot and insert it into the bottom. The result is a rutabaga that perches at a jaunty angle instead of just lying on its side.

turni[p sewing pattern

I hope you make rutabagas (or turnips)!  And if you do I’d love to see – you can email photos to me at info at ann wood handmade dot com or share on instagram using #annwoodpattern.

rutabaga sewing pattern

outfitting mrs. spots (and mr. socks)

rag doll : mrs. spots

rag doll : mrs. spots

Meet Mrs. Spots – a dear old friend of Mr. Socks. There have been a number of questions lately – and – I have wondered myself – if the tiny rag doll’s wardrobe could work for the Mr. Socks doll pattern.  I spent some time experimenting with that and – with some adjustments – it can – more on that in a minute.

cat rag doll sewing pattern

mr. socks

free patterns:

There are also a couple free patterns that come  in Mrs. Spot’s (or Mr. Socks) size – the hat pictured above –  get it here. And  a free felt jacket pattern.

Plus there is a free pants pattern here – gather the hem to use it for bloomers for Mrs. Spots.


rag doll : mrs. spots

adjusting the tiny rag doll pattern for mr. socks

Beginning with the dress (the dress is from the tiny rag doll pattern) – it needs to be a little larger,  Mrs. Spots is taller than the tiny rag doll and has considerable girth around the middle. There are two easy ways to do it – you can add a quarter inch to the dress pattern   – the cut line becomes the stitch line with the exception of the back center seam – don’t add extra there.

Or just enlarge the pattern to 115%  ( I have not tried this with the pinafore apron yet but I suspect enlarging it to 115% would work – if you give it a try I’d love to see).

rag doll : mrs. spots

rag doll : mrs. spots

For the coat – so easy – you can use the pattern at it’s original size but skip the hood and do not sew the back seam (step 3 in the pattern)  – leave the full width.  The little satchel works as is too. (The coat and satchel are both from the coat, bag and hat pattern).

mr. socks : sewing pattern   tiny doll : winter wardrobe

rag doll : mrs. spots

 You can make Mrs. Spots or Mr. Socks a bed and quilt too! Find the free patterns here.

free paper mache ship pattern

And they love to go boating – there is a free ship pattern there’s just right for Socks or Spots right here.

the somewhat weekly newsletter

Do you get my free weekly-ish newsletter? There are tips and tricks, ideas, stuff to try, all the latest news and blogposts and extra stuff, just for subscribers, delivered mostly on Friday. Pretty much.


a coat for tiny rag doll and a free tiny hat tutorial

tiny traveler

winter rag doll

Of course she needs a sensible coat!  And it’s reversible! I’m pretty excited about the reversibleness of the coat – and the nifty way it goes together – it feels like kind of a magic trick ( I included a video link for that part). I also love that the coat is built from just two pieces and demonstrates an awesome system for making reversible doll garments – you could modify the pattern and use the same easy technique to create all sorts of lined or reversible little clothes.

I also made a little lined flat bottomed satchel for her foraging and a hat  too. Tiny rag doll is ready for adventure.

Find sample pages from the pattern here and here.

tiny doll : winter wardrobe

shop_button_coat

tiny rag doll winter wardrobe

The winter wardrobe pattern is in the shop now

free tiny hat pattern

And I’m including the little hat pattern in this post too – download the template here and instructions are below – it’s very simple, easy and quick – you can make one in under twenty minutes.

For the tiny hat you will need a little wool, felt or flannel and contrasting embroidery thread. Pin the hat pattern to the fabric and cut out.

Whip stitch all around the bottom edge with a strand or two of embroidery thread.

ann wood tiny doll hat 3

Fold the hat in half and whip stitch the back seam from the bottom towards the tip.

tiny doll hat

Knot just before the tip and fray the tip. And finally tie little lengths of embroidery thread to the ear flaps and knot.

tiny_doll_hat

tiny traveler

She is fully outfitted for her travels. A couple other notes on the pattern- the coat and satchel will fit mr. socks too and you could scale it for other dolls. I have not tried the hat on mr. socks – but I think it would work if you enlarge it a little.

Find more tiny rag doll accessory DIY projects here!


tiny doll : winter wardrobe
ann wood handmade : tiny hat

the somewhat weekly newsletter

Do you get my free weekly-ish newsletter? There are tips and tricks, ideas, stuff to try, all the latest news and blogposts and extra stuff, just for subscribers, delivered mostly on Friday. Pretty much.


tiny rag doll nation

tiny rag doll by dawn

tiny rag doll by dawn

The  tiny rag doll pattern was not something I planned on or saw coming but I’m so glad I followed the impulse – it has been and continues to be a very happy thing.  A happy thing for me to make and a happy thing to share. I think it strikes a cord – a point of connection so many of you that show up here have in common with me and each other. It’s the kind of sewing I grew up doing – slow hand stitching.  There is sweetness, simplicity and nostalgia about it.  I came across this thought from Dawn – a tiny rag doll maker – she puts it perfectly:

I love the quiet peacefulness of stitching by hand, using a thimble, putting the tiny pieces together just so.  I feel a connection to countless other hand stitchers who came before me.  I think it comes through in the dolls.

The doll above – forward looking and ready for adventure is by Dawn ( as well as the next 3) and below I’ll share some other wonderful tiny rag doll work by customers. You can find more and add  your own to the ann wood handmade by you Flickr group – there are lovely things happening there – all sorts of ideas and details and variations being shared (including adorable crocheted wigs – a pattern from another fabulous tiny doll maker Beth – scroll all the way to the bottom of her page for the link).

I think it’s the perfect moment for a tiny doll revolution – the world needs more tiny handmade rag dolls  – an army of hand stitched little ladies who mean business.

P.S. If you’ve made a tiny rag doll and have details, variations or tips you’d like to share please do in the comments or email me and I’ll add it to the post.tiny rag doll by dawn

tiny rag doll by dawn

tiny rag doll by dawn

Below – tiny rag dolls by Karen:

tiny rag dolls by karen

 tiny rag dolls by Karen

Read More

doll experiments from the workshop and tiny rag doll : print-edition

a moth doll madefrom antique clothing in progress

tiny rag doll print pattern

Briefly – as there is much to cover today – the very first print pattern is in the shop. I’ve turned the tiny rag doll sewing pattern into a 16 page hand illustrated booklet accompanied by three pattern sheets.

mr. socks on vacation

It’s the first day of fall – it doesn’t feel like it but it will by Sunday and I’m looking forward to it – it’s been an airless summer in NY.  I got an excellent dose of forest, air and space at The Squam Art Retreat and so did mr. socks.  I also came back with lots of creative energy –  I love watching people move through their process and  getting glimpses into their imaginations. I taught two experimenting with dolls workshops and was impressed by the willingness to truly experiment and try things – to pick up a thread and follow it. It certainly isn’t easy but can take you to interesting and unexpected places. I’m deeply grateful to everyone who participated for their willingness to be open and vulnerable – I loved being part of it.  I’ve shared many dolls below and some were still being worked on – I hope to show you those soon- good things were happening…..

enchanted fish

Sondra’s enchanted fish

cedric randolf moth

Autumn’s gentleman moth –
“my name is Cedric Randolf. i am a moth, I fought in the Boar War. i am quite wise and quite old. in one eye i have a cataract, with my other eye i see only goodness”

rabbit girl

Rabbit Girl (in process) by  Tricia

moon

The moon – and all her phases…. by Jaime (fancy tiger crafts)

edwardian_lady

Vanessa’s Edwardian lady

(lots more photos after the jump)

Read More

tiny rag doll and wardrobe pattern

tiny rag doll sewing pattern

tiny rag doll sewing pattern

She’s fits in the palm of your hand, just the right size for a dollhouse, and she has a tiny wardrobe : dress, reversible pinafore apron, bloomers and a camisole.

tiny rag doll sewing pattern

There are full instructions for all. It’s a huge pattern with more than 80 color photos and tips to make small sewing easy and beautiful – like turning tiny pieces and hiding your knots.

How about those little clothespins?  They might be the best thing in the world.

tiny rag doll sewing pattern

And she has perfect tiny hair – the pattern shows you step by step how to create  it  easily – and the technique would work for other dolls too.    Plus the  trick for  turning  tiny  doll  parts  will  change  your life.

There are also patterns for a winter and summer wardrobe in the shop plus there are tons of free patterns and tutorials for your tiny doll like the miniature dishes above in the miss thistle society.

I hope you make tiny rag dolls and lots of outfits for them, if you do I’d love to see – send photos to info at ann wood handmade dot com or use #annwoodpattern  and #missthistlesociety on instagram.

tiny rag doll pattern
tiny rag doll sewing pattern

stripes make a sailor and the easy way to make sails

gentleman sailor owl

stitching sails

When I first started making ships I was doing little handkerchief rolled hems on the sails. They were pretty but drove me crazy and took forever.  When I put together the paper mache ship pattern I wanted something easier and I found it.  It’s super simple and has other benefits too.

sail

I  cut two pieces of fabric for each sail (not usually the same fabric – I like the front and back  to be different  – even just subtly),  pin them right sides together and stitch around – leaving one little section open. Trim the excess off the corners,  turn it right side out,  press and stitch closed.  I add a whip or blanket stitch around the edge and  layers of patches and lace.  You can click here to download the sail pattern below if you’d like to give it a try.

sail_pattern_annwood_2

This method is much quicker than the tiny hems and makes a very tidy sail.  Also the double fabric helps the sails hold their shape when you fill them with wind.

paper mache ship

I’m making an owl to captain the ship I’m working on  and used my favorite piece of antique ticking for his front.  Putting a horizontal stripe on an owl transforms him instantly into a gentleman sailor.  The owl below is the medium size from the little owl pattern.

gentleman sailor owl

And ticking stripes are nice for sailing mice too.

sailor mouse

how to make my signature frothy lace cake topper bird gown

fancy bird gown tutorial

bird wedding gown

There are lots of cake topper birds on my worktable right now. It’s been 10 years since I made the first set  and I guess-timate that I’ve made more than two thousand pairs.  That’s a lot of dressed up birds. Today I’m going to show you how to make my frothy little gown for a cake topper bird or any other formal bird occasion.  The bird is made from my little bird sewing pattern but I think you could use the same technique on other birds – just adjust the size of the lace.  I think it’s helpful to read through all the steps before beginning and you can click the images for a larger view.  You will need a basic sewing kit and some lace scraps – something soft and not to stiff or heavy is best – I’m using cotton tulle.

bird gown 1         bird_gown_2

1. Cut a piece of lace or tulle – a rectangle that is 7 and 1/2 inches by 3 and 1/2 inches.

2. Place the lace on the bird so there is a long and a short side – you want one third on one side and two thirds on the other. Fold the raw edge under and pin the lace to the back seam of the bird neck.

bird gown 3        bird gown 4

3. Starting with the short side turn the raw edge under and pin into the seam at the side of the neck and then again – right on the seam – about half way down the from of the bird body.

4. Repeat on the longer side – pin once at the neck and then bring the lace across the body – folding the raw edge under  and meeting the pin on the other side – use that pin to hold both sides in place.

bird gown 5        bird gown 6

5. Begin stitching the gown to the body where the sides meet – make a couple tiny stitches here and knot once – keep the thread attached.

6. Using tiny whip stitches stitch all the way around the neck twice. It’s important to go around twice to make sure the neckline stays in place.

bird gown 7        bird gown 8

7. Pin the short side of the lace back out of your way and pull the long side around the body. To make the fancy ruched front gather the top 3/4 of an inch or so with your fingers into little folds – pin in place with one or two pins and sew the folds in place along the seam ( these stitches won’t show).

8.  Use your finger to pull the long side of the lace around the body ( you may need to take out the pin holding the short side) and stitch the rest of the  lace to the seam, stitching towards the tail – again these stitches will not show.

bird gown 9        bird gown 10

9. Stop stitching where the body meets the tail and trim the lace – just leaving a small edge. Stop trimming about one half inch below top (where the little folds are) and leave a long piece of lace. (save your little scraps – we’ll use them later).

10. Pin the long piece you left out of the way and pull the short side of lace across the body. While holding the lace across the body stitch in the same place as the previous side, right on top.  Read More

a wardrobe for miss dahlia – progress on the tiny rag doll pattern

tiny rag doll

tiny rag doll

The body pattern for the tiny rag doll is worked out as well as the assembly and directions for the little details – like her shoes and hair.  I’ve moved on to patterns for her wardrobe. The original tiny doll  had attached fancy underthings that made assembling her difficult and  I love the idea of everything being removable so I devoted a big chunk of time to experimenting with tiny lingerie construction.  I came up with bloomers and 2 camisoles for the little doll above – miss dahlia.  I also made her a pinafore – that might be my favorite thing of all – in fact I want miss dahlia’s whole outfit for myself.

mini doll clothes

tiny_ragdoll_underthings

tiny rag doll back

tiny rag doll pinafore

miss dahlia and miss lilac

Here she is with miss lilac – all dressed.  I’m moving on to outerwear tomorrow – a winter coat and a satchel and then the tiny rag doll will be very well equipped for all her tiny doll adventures.

If you’d like an email when the pattern is available you can sign up here.

sailboats : a new sewing pattern and a sample sale

sailboat sewing pattern

The Sailboat pattern is here! Charming boats to sew. They twirl in the breeze and cast lovely shadows. The boats are a great way to use fabrics that are special to you – make a little memory vessel – there is lots of opportunity to personalize and embellish and create an heirloom. I also love to make them from old quilt tops that I pick up at fleamarkets and sometimes on Ebay. The pattern is in the shop now.

I hope you make sailboats!

sailboat sewing pattern

handmade sailboat and pirate

patchwork sailboat