The very first kits are in the shop!


Happy Thanksgiving,
ann


Everybody loves to go boating.
I’ve made you something! A free tutorial for a dear little paper mache boat ornament. The boat is 5 and 1/2 inches long and 6 and1/2 inches high – a very nice size for very nice mice or tiny rag dolls.


They are quick and simple to make (really quick! make a bunch) and only require little bits of fabric, cardboard and other things you probably already have. And the pattern scales up easily – if you’d like to make a larger boat. I think it is helpful to read through all the steps before you begin.

* You can click each image for a larger view.


1. Place the boat template on your cardboard and trace the outline. Mark the fold lines (the dashed lines on the template) in colored pencil. Use the BACK of the exacto knife to lightly score the fold lines. Cut out the template.
2. Gently fold at the scored fold lines.


3. Bring the front sides and bottom together.
4. Tape over the tabs with masking tape – it’s helpful to tear off several little pieces of tape so they are ready when you need them.


5. Tape over the outside seams as well.
6. Fold up the back of the boat and tape over the tabs as well as the outside cardboard seams.


7. Fold the boat bottom flap tabs toward the print side.
8. Fold the bottom flap into the boat and tape over the tabs


9. Fold the sides over – into the boat.
10. Tape along all the edges. We are ready for paper mache.
paper mache tips: Because the boat is small and our armature is sturdy – one layer of paper mache is enough. If you are making a larger boat use at least two layers. Tear small pieces of newsprint – roughly an inch or smaller – small pieces of paper create a smooth sturdy result- use the smallest pieces for covering corners, tight curves and edges. I like commercially prepared wall paper paste – available at most hardware stores Collect text scraps for embellishing.


11. Begin with the edges – paint paste onto the boat – apply a piece of paper and paint paste over.
12. After covering the edges fill in the rest of the areas. One layer of paper is enough for a small boat – two will make it even sturdier. If adding a second layer there is no need to wait for the first to dry. Read More


Mr. socks is in print! My second print pattern is in the shop. It’s a 12 page booklet with 47 hand drawn illustrations. I’m starting another print pattern this evening while the mechanics of putting it all together are all still fresh in my mind. And while my drawing muscle feels strong. I love the little booklets – they are a giant amount of work but I love making them.


Maybe you’ll make a mischievous cat. Maybe he will have an adventure. I’m rolling around the idea of a photo contest for later this summer – more on that soon.


It’s a relatively quick project – depending on how long you linger in the details. I’ve taught it at a workshop and fabulous turnips and rutabagas were created in under 4 hours.

Personally – I like to linger in the details of these – especially the appliqué. It’s repetitive, easy, relaxing work that requires just enough attention to make it the perfect activity for percolating ideas. Or netflix.
I make it my job to have ideas – lot’s of ideas – and I love the sensation of letting an idea percolate, letting my subconscious have a crack at it. I drift into pleasant, soft focus daydreamy work and behind the scenes problems get solved, perspective shifts and connections are made. A brisk walk works too but then I don’t get a lovely rutabaga out of the deal.
I also like the appliqué portion of the program because it goes against my grain a little (a lot). I’m sometimes afraid of raw edges in a way that inhibits me creatively – I can get too obsessed with being neat and buttoning things up and lose the essence of the thing. I’ve been experimenting with pretty traditional appliqué (I’ll show you soon) and would like to get a little free-er in my designs.

Besides the meditative benefits there are so many reasons to make a rutabaga (or turnip) – they are, I think, the most beautiful of the root vegetables. No one is ever expecting a stitched turnip so they make wonderful gifts. And these rutabagas have a secret ingredient that makes them balance in a dynamic, root vegetable-lish way.

I add a little weighted fill – 1mm glass bead fill is my favorite. You can also use sand or crushed walnut shells. I put 2-4 spoonfuls in the toe of an old pair of tights to keep it in one spot and insert it into the bottom. The result is a rutabaga that perches at a jaunty angle instead of just lying on its side.

I hope you make rutabagas (or turnips)! And if you do I’d love to see – you can email photos to me at info at ann wood handmade dot com or share on instagram using #annwoodpattern.


Meet Mrs. Spots – a dear old friend of Mr. Socks. There have been a number of questions lately – and – I have wondered myself – if the tiny rag doll’s wardrobe could work for the Mr. Socks doll pattern. I spent some time experimenting with that and – with some adjustments – it can – more on that in a minute.


There are also a couple free patterns that come in Mrs. Spot’s (or Mr. Socks) size – the hat pictured above – get it here. And a free felt jacket pattern.
Plus there is a free pants pattern here – gather the hem to use it for bloomers for Mrs. Spots.

Beginning with the dress (the dress is from the tiny rag doll pattern) – it needs to be a little larger, Mrs. Spots is taller than the tiny rag doll and has considerable girth around the middle. There are two easy ways to do it – you can add a quarter inch to the dress pattern – the cut line becomes the stitch line with the exception of the back center seam – don’t add extra there.
Or just enlarge the pattern to 115% ( I have not tried this with the pinafore apron yet but I suspect enlarging it to 115% would work – if you give it a try I’d love to see).


For the coat – so easy – you can use the pattern at it’s original size but skip the hood and do not sew the back seam (step 3 in the pattern) – leave the full width. The little satchel works as is too. (The coat and satchel are both from the coat, bag and hat pattern).


Of course she needs a sensible coat! And it’s reversible! I’m pretty excited about the reversibleness of the coat – and the nifty way it goes together – it feels like kind of a magic trick ( I included a video link for that part). I also love that the coat is built from just two pieces and demonstrates an awesome system for making reversible doll garments – you could modify the pattern and use the same easy technique to create all sorts of lined or reversible little clothes.
I also made a little lined flat bottomed satchel for her foraging and a hat too. Tiny rag doll is ready for adventure.
Find sample pages from the pattern here and here.


And I’m including the little hat pattern in this post too – download the template here and instructions are below – it’s very simple, easy and quick – you can make one in under twenty minutes.


For the tiny hat you will need a little wool, felt or flannel and contrasting embroidery thread. Pin the hat pattern to the fabric and cut out.
Whip stitch all around the bottom edge with a strand or two of embroidery thread.

Fold the hat in half and whip stitch the back seam from the bottom towards the tip.

Knot just before the tip and fray the tip. And finally tie little lengths of embroidery thread to the ear flaps and knot.


She is fully outfitted for her travels. A couple other notes on the pattern- the coat and satchel will fit mr. socks too and you could scale it for other dolls. I have not tried the hat on mr. socks – but I think it would work if you enlarge it a little.


Mr. Socks is going to sea in his very own ship. I made it using my free paper mache boat pattern with a couple changes. If you’d like to make your own follow the original boat instructions but to make it just right for Socks use:
this slightly smaller template
(a note on sail making – there are instructions here if you need them)

Socks is the kind of cat that does just what he wants so he is off to Paris for a holiday in his brand new ship.


 au revoir mr. socks!


Woebegone pines, forlorn little trees who do not concern themselves with perfection. These trees are all about heart and the particular magic that something made by hand possesses. I’ve made you a sewing pattern with three sizes: small – 3 inches, medium – 4 inches, and large – 6 inches (the little guy is my favorite). You can add a little trunk and base or just set them on their bottom.


And Woebegone Pines sounds like a lovely place – doesn’t it? A perfect spot for a mouse to take a stroll and think his wistful thoughts.

pattern notes:
The seam allowance is 1/4 inch. You could use a variety of fabrics – I’ve used cotton, linen. wool and felt – all worked well.

1. Cut out the cardboard base and one or two squares of corrugated cardboard – smaller than the circle.
2. If you plan to add a trunk to your tree glue one of the corrugated pieces to the center of the circle. ( If you are making the large tree glue two – one on top of the other).

3. Use a glue stick to attach the circle to cotton batting and cut out. Let the glued cardboard dry completely.
4. Pin the tree and tree bottom patterns to a single layer of fabric – cut out one of each.

5. Fold the tree piece in half (right sides together) and mark the seam lines on the tree and circle. Stitch the seam – marked in red. Leave the center of the seam open – about 1/3 of it – enough to fit the cardboard circle through later.
6. Snip the seam allowance at the top and bottom of the opening, fold over and press.


He’s a mischievous cat….. I’m so happy to share the sewing pattern with you today – you can find it in the shop right here. 


What adventures will your mr. socks have? I’d love to see! You can email photos to me at info at ann wood handmade dot com, share them on flickr or use #annwoodhandmade on instagram.
I get pretty excited when I finish a sewing pattern. They take forever and parts of it are deeply tedious. Usually at some point along the way it feels like it will never be done and I have to swim through a torturous spell. And then all of a sudden there’s a surge of momentum and it’s done. I’m going to bask in the glow of completion for a day and then dive in to making another – what do you think it should be?

The tiny rag doll pattern was not something I planned on or saw coming but I’m so glad I followed the impulse – it has been and continues to be a very happy thing. A happy thing for me to make and a happy thing to share. I think it strikes a cord – a point of connection so many of you that show up here have in common with me and each other. It’s the kind of sewing I grew up doing – slow hand stitching. There is sweetness, simplicity and nostalgia about it. I came across this thought from Dawn – a tiny rag doll maker – she puts it perfectly:
I love the quiet peacefulness of stitching by hand, using a thimble, putting the tiny pieces together just so. I feel a connection to countless other hand stitchers who came before me. I think it comes through in the dolls.
The doll above – forward looking and ready for adventure is by Dawn ( as well as the next 3) and below I’ll share some other wonderful tiny rag doll work by customers. You can find more and add your own to the ann wood handmade by you Flickr group – there are lovely things happening there – all sorts of ideas and details and variations being shared (including adorable crocheted wigs – a pattern from another fabulous tiny doll maker Beth – scroll all the way to the bottom of her page for the link).
I think it’s the perfect moment for a tiny doll revolution – the world needs more tiny handmade rag dolls – an army of hand stitched little ladies who mean business.
P.S. If you’ve made a tiny rag doll and have details, variations or tips you’d like to share please do in the comments or email me and I’ll add it to the post.


Below – tiny rag dolls by Karen:


Briefly – as there is much to cover today – the very first print pattern is in the shop. I’ve turned the tiny rag doll sewing pattern into a 16 page hand illustrated booklet accompanied by three pattern sheets.

It’s the first day of fall – it doesn’t feel like it but it will by Sunday and I’m looking forward to it – it’s been an airless summer in NY. I got an excellent dose of forest, air and space at The Squam Art Retreat and so did mr. socks. I also came back with lots of creative energy – I love watching people move through their process and getting glimpses into their imaginations. I taught two experimenting with dolls workshops and was impressed by the willingness to truly experiment and try things – to pick up a thread and follow it. It certainly isn’t easy but can take you to interesting and unexpected places. I’m deeply grateful to everyone who participated for their willingness to be open and vulnerable – I loved being part of it. I’ve shared many dolls below and some were still being worked on – I hope to show you those soon- good things were happening…..

Sondra’s enchanted fish

Autumn’s gentleman moth –
“my name is Cedric Randolf. i am a moth, I fought in the Boar War. i am quite wise and quite old. in one eye i have a cataract, with my other eye i see only goodness”

Rabbit Girl (in process) by Tricia

The moon – and all her phases…. by Jaime (fancy tiger crafts)

Vanessa’s Edwardian lady
(lots more photos after the jump)


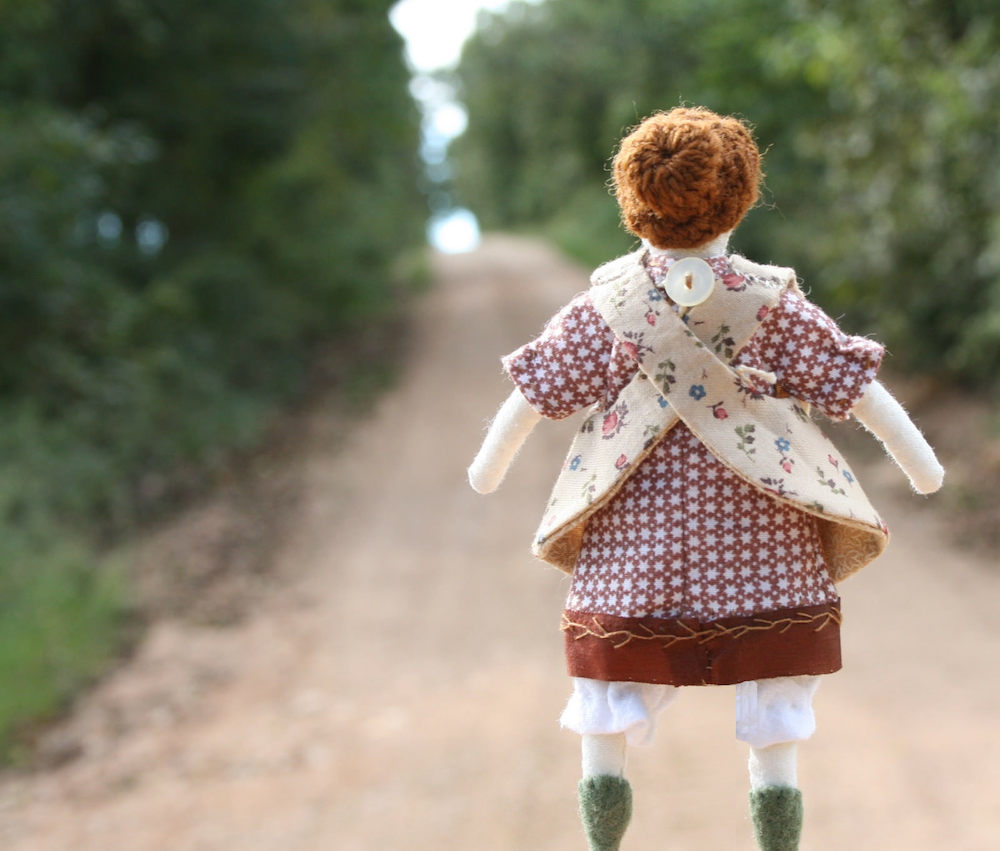
She’s fits in the palm of your hand, just the right size for a dollhouse, and she has a tiny wardrobe : dress, reversible pinafore apron, bloomers and a camisole.

There are full instructions for all. It’s a huge pattern with more than 80 color photos and tips to make small sewing easy and beautiful – like turning tiny pieces and hiding your knots.
How about those little clothespins? They might be the best thing in the world.

And she has perfect tiny hair – the pattern shows you step by step how to create it easily – and the technique would work for other dolls too. Plus the trick for turning tiny doll parts will change your life.


I hope you make tiny rag dolls and lots of outfits for them, if you do I’d love to see – send photos to info at ann wood handmade dot com or use #annwoodpattern and #missthistlesociety on instagram.


