Category: birds

crow sew-along week 2 : top secret trick for wing texture

stitched crow wings with black feathery ruffles at the top

Welcome to week 2 of the crow-along!

Your goal for this week is to make your wings and tail. That’s steps 33 – 54 in the pattern. Please read through those steps before you start, it helps a lot to see where you are headed before you begin.

week 1 of the sew-along is here

stitched crow wings with black feathery ruffles at the top

The wings and tail are easy and quick and I’ve got a couple tips to make them even more crowy.

Tip #1 – Stripes are your friend.

Stripes give your feathers a little extra bang for the buck. With 2 layers of fabric, right sides together, place the feather pattern piece on the  diagonal and cut, super simple. A variety of scale is nice too.

The pieces are tacked down with a little glue stick. You can hand or machine sew the lines (step – 47 in the pattern.

Tip #2 – My top secret method for making feathery texture with a light weight fabric


Please watch the video above (click here if you don’t see the video). And I’ll go over the basics below.

You need a strip of lightweight fabric. The strip should be about 16 inches (it’s more than you will use but you don’t want to run out) of un-gathered fabric per wing. It’s about 1 and ¼ inches wide.

Gather the strip by hand or machine. My stitch line is slightly off center. It’s super quick and easy to do on the machine by turning the tension to the highest setting and the stitch length to the largest setting. If you’re gathering by hand make a back stitch after every couple inches to keep it from all unbunching.

Read More

crow sew-along week 1 : making the body shape

textile crow and printed fabric overdyed with purplish black on my work table

Welcome to week 1 of the crow sew-along, or, crow-along! This week will be focused on getting the body shape sewn and stuffed. That’s steps 1- 32 in the sewing pattern, so do-able!

If you are new to this kind of sewing it seems like a lot before you begin. Focus on accomplishing one step at a time. Each step is super simple if you just focus on that task. You’re going to make an awesome crow.

How this sew-along works :

Each week we will focus on completing one section of the pattern. There will be a blog post with tips and some additional insight or instruction. All the pattern steps will not be recreated in the blog post – please follow the pattern steps in your pdf and read each section before beginning.

Please check the blog on Fridays for sew-along posts – there will not be an email each week.

This is not a class or live event. You don’t need to sign up for anything or be available at a particular time. All you need to do is purchase the crow pattern and complete the steps each week – sharing on instagram or facebook is totally optional.

Ask questions or offer your own tips in the comment section. There are lots of people participating and some are beginners. If you have made the crow before or you’re an experienced sewer and can help out with questions that is very much appreciated.

For sharing images and discussion please use #annwoodcrowsewalong and #annwoodpattern on instagram and you can join the crow facebook group.  At the end of the sew along I’ll also provide an email you can send photos to so you can share your finished crow that way if you like.

Let’s start by checking out how the parts come together to make a 3 dimensional shape. Seeing the bird assembled helps you get your head around the construction steps before you start. This is especially helpful if you haven’t sewn anything 3-D before. Please watch the video above – if you don’t see the video click here.

week 1 – making the body

Please read the pattern notes and at least the first 32 steps before beginning.

textile crow and printed fabric overdyed with purplish black on my work table

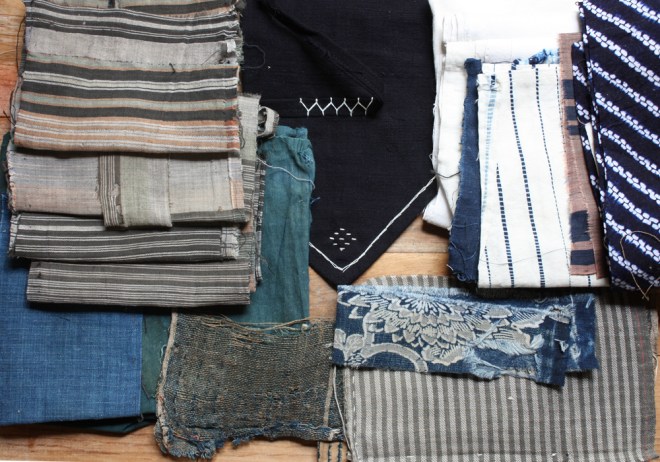
I chose a cotton fabric salvaged from a vintage apron for the body.  The wings and tail will be made from that fabric as well as other scraps that were overdyed in black. Overydyed fabric is a great way to use a bunch of old clothes or fabric  scraps you already have for your crow. It’s especially helpful if you’re feeling stuck on fabric selection, throw a bunch of scraps in a dye bath and see what turns up. The fabrics above were dyed with RIT dye which gives a very purple tone.  I’ll mix these with some true black for variety in the feathers.

In steps 1- 4 of the pattern you will cut out your pattern pieces and mark the seam line.  Careful cutting will make the rest of the project much easier and  it’s super important to not skip marking the seam line even if you are a very experienced stitcher. I’m using a white colored pencil. Measure and mark dots at ¼ inch  all around the pieces and then connect the dots. It goes fast – marking all the pieces only took about 15 minutes. Pro tip: place a sheet of fine sandpaper under the fabric piece and it won’t slide around so much.

Also mark the front of the head and the section to leave open.

In steps 5 – 8 we begin to assemble the body by adding the head gusset. If this is your first gusset congratulations! Notice I’ve used a ton of pins. I’m sewing the seam on the machine and I don’t want my carefully matched edges to move around. Pin and sew the other side of the head and follow steps 9-11 to sew the back seam.

the exciting and magical world of darts!

Darts are magic, they pull the crows legs under him. Darts look scary and complicated but they’re not! And once you know how darts work a new world of sewing possibilities is available to you. Before we install the underbody we sew the darts. Make your marks carefully using the dart template (steps 12-13).

Fold the leg in exactly on the fold line (step 14). I always stitch these by hand using super small stitches.

Read More

the first ever sew-along : make a crow (or raven)

handmade textile crow on a table with stones, cermaic vessels, plants and crystals- there is an antiquey feel

One of the great things about a sew-along is it gives you a container, some structure, for a project you might have on your someday list. It breaks it down into manageable pieces and those milestones create momentum. Plus the fun of working on something with lots of other people, the extra motivation and  inspiration that comes with that. And you get insight and tips that go beyond the pattern. We can take deeper dives into stuff like fabric choice, sewing tips and details.

handmade textile crow on a table with stones, cermaic vessels, plants and crystals- there is an antiquey feel

October is a perfect month to make a crow (or raven) and the first ever! ann wood handmade sew-along begins on Friday September 30th 2022. That gives you (and me) two whole weeks to get your stuff together.

A great way to start is the box method.  An actual container. Everything I make starts in a box and lives there until it’s done. The boxes are for organization and they are also a thinking tool. Most importantly a way to start, it is very easy to put things in a box.

In the sew-along posts I won’t be recreating every step of the pattern but I will be demonstrating some steps with further detail and tips. Also if you are participating and tagging on instagram, your progress photo might get featured.

Please use #annwoodcrowsewalong and #annwoodpattern . And – also optional -there’s a facebook group you can join here.

what you’ll need to participate:


sewing pattern for a realistic crowget the pattern button

The crow pdf sewing pattern (sorry booklets are not currently available)

Some time – the sew-along will take place over 4 weeks. I’ll give you a schedule on the kick off day (9/30) of what needs to be accomplished each week. Plan on having 2 – 4 -ish hours per week to work on your crow steps.

The pattern contains a material list but a couple notes:

Fabric – For the body a medium weight cotton is ideal. Scraps of silk and velvet work well for feathers and details. Incorporate different shades to give the feathers iridescence – very dark blues, green and purples work well.

Old or vintage clothes are great – suits, lace, prints over-dyed with black would be cool. And speaking of prints, your body fabric does not need to be solid. I used a calico print for the crow in the pattern. Most important is to have a variety of sheen, textures and tones.

textile crow on a pink table next to a pile of black scraps from victorian garments

Really old garments are interesting and inspiring to work with, lots of pleats and trims etc. Ebay is a good source and there is a helpful link in the crow pattern to a specific search category that I’ve been using for years. If you are persistent you can pick up damaged antique garments for not too much money that make great feathers.

There are resource links in the pattern for a couple supplies that are out of stock. I don’t currently have an alternative source for the paper covered wire for feet so we will use the alternative method included in the pattern and make our own. You can find the 18 gauge wire you’ll need in most hardware stores. And floral tape is available in lots of places online and in most big craft stores.

Let’s get inspired! Checkout a few crows made from the pattern.

handmade crow posed on a pink upholstered chair in a forest

Meg McElwee (sew liberated) wrote a beautiful post about her experience stitching her crow – check it out here.

And more awesome crows below – links to the makers where possible.


1. by Maralee, 2. by Brandi, 3.  by Amy, 4. by Donna 5. by Elizabeth

Are you feeling inspired to stitch a crow? Gather your materials and check back on September 30th for the first sew-along post. If you feel like sharing your material gathering I’d love to see -please use  #annwoodcrowsewalong and #annwoodpattern on instagram. There’s also a facebook group – you do not have to join to participate but you can if you like – find it here.

sew along links:  week one     week two     week three      week 4

making a cardinal or other crested bird

cardinal sewing pattern

You’ll need the songbird sewing pattern and details below to make your cardinal.

cardinal sewing pattern

It’s surprisingly quick and easy to create a fabric crest for a cardinal or bluejay or tufted titmouse etc. etc.. The tutorial that follows was created for my songbird sewing pattern – but you could adjust the size to fit pretty much any bird pattern.

cardinal sewing pattern

We made cardinals in a workshop in Vermont.  It was a great weekend and the cardinals are awesome. Check out more about the workshop at the end of the post.

The Cardinal Modifications

songbird sewing pattern

You can find the songbird pattern here

– or use any bird pattern you like and adjust the template size.


download the crest template


how to sew a cardinal

1. Download and cut out the templates.  Cut the face cover and 3 crest pieces from fabric.

2. Place the face cover on your bird –  around the  beak – trim and adjust the size however you like – for this demonstration I left it full size.

3. Pin it in place – overlap the top corners to make it fit snuggly and stitch in place.

4. Pin the head cover in place and stitch around the edge.

5. Pinch the pointed end of the crest 1 piece.

6. Pin in to the top of the head and stitch around the edge.

7. At the back stitch the sides of the opening together – just at the base.

8. Pin the crest 2 piece the same way – on top of crest 1 and stitch around the edge.

9. Again stitching the edge together  – just at the base.

cardinal sewing pattern

10. Add the third crest piece. Optional – fray the edges or make a few stitches through the crest layers. Stitch simple eyes onto the face cover.

So easy! If you try making a crest I’d love to see! Use #annwoodpattern on instagram

A couple more workshop highlights – 2 students brought a pin girl for everybody!! I love them – find the free sewing pattern to make your own here.

pin girl sewing pattern

fabric cardinal workshop with ann wood

cardinal sewing pattern

cardinal sewing pattern


the songbird pattern is in the shop and a free tutorial : how to make a realistic bird foot

sewing pattern for a textile songbird

The songbird PDF pattern is in the shop.

Get the PDF digital pattern here and the booklet version here.

It has more than 100 color photos and detailed instructions.  You need basic sewing skills and some patience if you are a beginner.

stitched songbird in a tree

textile songbird in prospect park

hand stitched songbird - back

And to celebrate the instructions for making a realistic bird leg are below. I hope you make songbirds!

How to make a realistic bird leg with wire:

You can use any gauge wire you like, I think that 19 gauge soft annealed wire is the easiest to work with and provides enough stability for the legs. You can build up the thickness of the legs and feet by adding additional layers of floral tape.

how to make a realistic bird leg - step 1

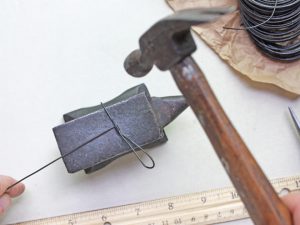
1. Gather the wire, floral tape, hammer, pliers and cutters, ruler and a surface to hammer on, I’m using a little anvil but any very hard surface will do.
Cut 2 –  12 inch lengths of wire.

how to make a bird leg - step 2     how to make a realistic bird leg - step 3    2. Hold the wire with the pliers 1 and 1/2 inches from one end.
3. Bend the wire forming a loop.

how to make a realistic bird leg - step 4     how to make a realistic bird leg - step 5
4. Hold the loop just past where the wire crosses with the pliers. Bend the long end of the wire so it is perpendicular to the loop.
5. Wrap the long end of the wire around the short end behind the loop. Wrap as tightly as you can, keeping you fingers very close to the wrapping.

how to make a realistic bird leg - step 6     how to make a realistic bird leg - step 6
6. Place the wire on a hard surface and tap firmly with the hammer to flatten the wire wrapping. This will help the wrap hold in the next step.
7. Use wire cutters to snip the loop in the middle.

Read More

the intersection of real and pretend and make a little felt bunny

a wedding party of little birds in the forest

birds of adventure

Interesting things happen at the intersection of real and pretend. There is a shift, scale becomes playful and there is instant magic, instant enchantment. Nothing is certain and anything is possible.

handmade bird with an acorn beret

little bird sewing pattern


That intersection is always on my mind when I’m making something, especially the little birds. I love to photograph them in the park or a forest.  It is still one of my favorite things to do.

Get the little bird sewing pattern.


enchanted path in the forest

The forest casts its own spell, offers its mystery and magic.  And the camera adds to it, it drops a glass dome over the moment and crystallizes the atmosphere.

a wedding party of little birds in the forest

It creates a world where if you just look a little closer, a little sharper, you might catch a glimpse of little birds exploring or tiny bunnies in joyful procession. Maybe they’ve been there all along and you just never noticed before.

handmade felt bunnies

About those bunnies…

ann wood : very nice mice pattern


My sister made them from the very nice mice pattern (just add long ears) a couple years ago and took the photo. I love their expressions.

And it’s bunny season and almost spring, make some bunnies and take a photo! I’d love to see. Use #annwoodpattern on instagram.

the somewhat weekly newsletter

Do you get my free weekly-ish newsletter? There are tips and tricks, ideas, stuff to try, all the latest news and blogposts and extra stuff, just for subscribers, delivered mostly on Friday. Pretty much.


bird work : piratizing with ease and precision

fortuny pirate birds

fortuny pirate birds

I still make birds! And they still like to dress up like pirates (find the sewing pattern to make your own here). I’m particular about eye patch placement and I also like to make sure they stay in place, the little string especially. The patch is made from black card stock with glitter because they are those sort of pirates, the glittery eyepatch sort.  I use embroidery thread for the string and I sew it in place before gluing on the patch.

fortuny pirate birds

Start at the back and leave an end hanging. Make a tiny stitch at the back of the head.

Make another anchoring stitch at the temple and again where you will place the patch.

Finally come around to the back and knot again where you started.  Glue the patch on and wrap floral tape around to hold it firmly place while the glue dries.

fortuny pirate bird

fortuny pirates

Hello Pirates!

Try this:

very nice mice : free sewing pattern      little boat ornament

Do you get the weekly newsletter? Check out a past edition here and you can sign up here.

confronting the pigeon : progress on my city bird

stitched pigeon progress

I like pigeons. I like the city beasts.  And I have an affinity for the less loved creatures, ants bats, rats, mosquitos etc. Pigeons fit right in.  What I love best about them is that they manage to be imperious and goofy – all at the same time.

So I want to make a pigeon. I stalled in the muslin draft phase. Stalled real good. The universe keeps sending me excellent pigeon fabric though. Maybe that’s why I got stuck – couldn’t choose. There is also a little anxiety about when to move out of prototyping – and all the freedom and experimenting that affords – into trying one in beautiful pigeony fabric.

stitched pigeon progress

I ended up deciding to combine a mix of collections in a way I don’t very often. I used Fortuny for the body and will use it for the feet also, an Edwardian pinafore and other garment scraps will be feathers and some beautiful teal from Sri Threads for the head.

stitched pigeon progress

The teal is what finally got me to take a shot at turning out a finished bird. It arrived lately with some other magnificent pieces and I couldn’t resist trying it. I’m happy with the shape and I’ll move into details this weekend and start a couple more too – using more of the exquisite things from Sri.

sri threads textiles

A condescending yet vacant  pigeon or two should be forth coming.

recreational patchwork and 18th century songbirds

fortuny patchwork

After working on something small, detailed and intense I like to give my focus and brain a vacation. One of my favorite ways to do that is something I call recreational patchwork. I started a Fortuny patchwork piece today. I have lots of very small swatches and some longish strips – drapery scraps. It is good daydreamy work. It requires just the right amount of my attention for letting ideas percolate. It’s a peaceful, gentle state.

fortuny patchwork

I work quickly – making strips and then sewing them together – log-cabin-ish I guess. Nothing is planned – I just grab pieces randomly. Nothing is measured, corners aren’t square and seams are less than straight. I bounce between the machine and the ironing board. I love the energy of it, I love the result and it’s such fun to do – to not think or plan and see what turns up – embrace the happenstance, appreciate the happy accidents.

18th century birds

sewing pattern for a textile songbird

Get the song bird sewing pattern.

It was a welcome shift after working on a trio of 18th century songbirds for one million years. Songbirds are focused and detailed. I want something particular from each of them and I can’t stop until I get it. The prize at the end is I get to photograph them – and that is such fun.

P.S. Checkout the free bird leg tutorial here.

ann wood : songbirds


visible mending and a victorian bird

mending

In 1978, Soviet geologists discovered a family of six, in the vast and wild Siberian forest. They had been living there, in a cobbled together shack by a stream in complete isolations for 40 years. They missed World War 2.  Geologist Galina Pismenskaya recalled her first encounter with the family:

“The low door creaked, and the figure of a very old man emerged into the light of day, straight out of a fairy tale. Barefoot. Wearing a patched and re-patched shirt made of sacking. He wore trousers of the same material, also in patches”

I wanted to share the story with you because the details of their life and survival are astounding – you can find the article here.  And the image of the old man’s clothing grabbed me – I guess you could call it extreme mending.  Mending is fascinating and I think so often beautiful.

My policy on possessions is have good things you love, not too many, and keep them for a long time. I almost never buy clothes. There are a just a couple exceptions – every once in a while I buy a smock dress from Cal Patch and wear it relentlessly.  First there was this one and then last summer this one.  It’s my uniform – I like having a uniform.  Most of what I have was given to me and much of it I’ve had for a long time. I mend things, make do, re-use and repurpose. I like the practicality – economy and the aesthetics.

The blue jacket was given to me 15 years ago I think – I wore the sleeve edges ragged and I’m patching them with lovely old cloth from Sri Threads.

mending

The green jacket above I’ve had for about 20 years – it has lot’s of issues but not enough to let it go – I’m patching it with gorgeous Fortuny scraps.  I’m partial to flannel shirts and the red plaid above is a favorite – besides the ragged sleeves (I’m hard on sleeves) It had a big hole under one arm. Nothing says success like an underarm hole.  I patched it with a 19th century dress maker’s scrap.

dress mend

And the dress above – also a hand me down – is one of my most adventurous mends. The bottom of the skirt had a big section with glue or something spilled on it. I cut it out and sewed in a section from a cotton camisole. There was a little button loop and I left it at the bottom and added a button to the seam so I could pull the hem up. Pretty fancy.

me and moose

And Moose – there has to be a photo of Moose and she sort of agreed to participate. She visited here all week – such a good kitten.

In other sewing news – I finished the victorian bird! 9 years after starting – but still – so good to get it done. It’s made form antique garments.

victorian bird

sewing pattern for a realistic crow


I used the crow sewing pattern for the basic shapes and construction and then did tons and tons of of applique with tattered silk scraps and added glass beads for eyes.

get the crow sewing pattern 

victorian bird


the somewhat weekly newsletter

Do you get my free weekly-ish newsletter? There are tips and tricks, ideas, stuff to try, all the latest news and blogposts and extra stuff, just for subscribers, delivered mostly on Friday. Pretty much.


bundled up birds and paper mache teacups at anthropologie

ann wood anthropologie teacups

I’ve been wanting to tell you about this for ages. I began working with Anthopologie last fall on a couple projects for this holiday season – paper mache teacups and bundled up little fabric birds.

ann wood anthropologie birds

They are both items that are near and dear to me and I have a particularly long history with the little birds – it began more than ten years ago. I walked into Anthropologie on Fifth Avenue today and there they were – lots and lots of familiar little birds looking back at me. It was a little disorienting and it’s kind of a funny thing to think about – how many little birds and teacups there are in the world now.  I am not someone who thinks in quantity.  I think its a good thing though  – a good thing that there is a place in the bigness and busyness of the world for paper mache teacups and earnest little fabric birds.

ann wood anthropologie teacups

There are two birds and two  teacups – one a souvenir of Paris and the other New York City. The insides have festive stripes and dots and are sparkly.

ann wood anthropologie teacups

I had fun making them – loved painting the illustrations for the cups.  You can find the birds and teacups online and in stores – you can find Anthro’s entire ornament assortment for this year here (there is lots of fun stuff – including an oyster by Tamar Mogendorff).

Or if you like you can make your own. Find the pattern for the teacups here and the little bird sewing pattern here.

gift tags and a caption contest – updated

ann wood birds

ann wood birds

update 12/17 :

Thanks so much for your wonderful imaginations – so many good captions!  And there was – by unanimous decision – a tie – so 2 birds will be awarded.  And the winners are:

Debra : “Four calling birds, three acorn caps, two spools of thread, and a pincushion filled with many needle sharps!”.

And Bach Hanes  :  Everyone ready? Let’s get the flock out of here.

Thanks again to everybody who came up with a caption.

**************************

I sure do like to make a little bird, put an acorn hat on it and take its picture.  I love the photos in part because everyday things are transformed into little  bird world things – I imagine their perspective and peek into their world and wonder what they are up to…

What do you think they are up to? Make up a caption for the photo above and leave it in the comments of this post.  An esteemed panel of judges will choose a winner who get’s their very own bundled up bird. Everyone is welcome to participate.

bundled up bird

little house gift tagsAnd gift tags! A little yellow house in the forest – print them on card stock, fold at the roof and add a little glitter and a string or ribbon.  Click here to download the little house tags.

A couple notes:

* The red ribbon in the photo above is 4 mm silk ribbon – I love it – you can get it here.

* The pattern for the little birds is here.

* And the little birds in the photo are in the shop now and I restocked a couple bunnies and squirrels too.