Tag: textiles

fall project ideas, sew a scrap quilt on a foundation plus a spooky read

quilt blocks made with vintage scraps

Happy National Sewing Month to those who celebrate. I’m not even making that up, it’s a real thing since 1982. My big fall project is a scrap quilt. I’ve never gotten a quilt across the official finish line. I’ve made a couple tops that ended up as duvet covers which doesn’t really count.

lovely old quilt

This is one of those past efforts (in 2016 Brooklyn).

This time there is a do-able plan and a legit quilt is gonna happen. The kind you run into at flea markets, soft, homespun and scrappy but sturdy enough to really use.

quilt blocks made with vintage scraps

sew a scrap quilt on a foundation

It’s going to be sewn one block at a time to foundation fabric (lightweight muslin).

What I love about this plan:

  • The square muslin “container” inspires me.
  • The one block at a time thing makes it feel doable. I can babystep my way through it.
  • The foundation gives the very scrappy  scraps extra stability and makes the blocks easy to deal with.

There will eventually be a schedule for how many blocks per week but I’m messing with the process for a while to experiment my way towards what I want.

The muslin blocks are 10 inch squares. I don’t know exactly what the finish size is yet – I’ll figure that out after I have 50 or so blocks to play with. I will keep you updated on all the scrap quilt developments as they happen.

The foundation method is stitching scraps to the muslin. I’m using an improv process, no planning ahead, just grabbing scraps and stitching them on. That’s the kind of “make do” utilitarian and vintage feeling quilt I’m looking for. I think the quilting will be super simple and oldschool too, I’m leaning in the direction of yarn knots.

If your’e into a more organized process and result you can find a great tutorial for sewing a string quilt on a foundation here.

Before beginning I washed the muslin and scraps. To start, cut your foundation squares and pin a scrap, place another over it (right sides together) and stitch a seam (¼ inch seam allowance)

Fold the fabric over and press. Place another scrap over it and repeat until your muslin block is covered.

Flip the square over and trim the edges. This step is weirdly satisfying. Put the cut offs back in the scrap pile if they’re big enough.

The first couple squares I made over the weekend are sewn by hand but the plan is to mostly machine sew. I already like it.

table with vintage paper back and patchwork pouches

the spooky read

My friend Katy and I read a spooky vintage book every year. This years selection is “The Other” Thomas Tryon. We both love a scary novel, preferably written in the 70’s and preferably made into a film in the same decade and preferably a vintage copy with old book smell. Previous titles include Burnt Offerings and Rosemary’s Baby. This one is a winner on all counts.  I got it on Ebay for 6 bucks.

4 fall project ideas

It’s the perfect time to make a crow! This beautifully stitched example  was made from the crow sewing pattern by super talented stitch club member Kari M. If your crow needs a hat find a free template and diy for a paper hat here.

making sharp applique points

Bat Applique –  or “batlique” Get the free template and diy instructions here. They are especially cool stitched to vintage linens. And you’ll learn how to make super pointy applique points.

owl ornaments made from scraps

Owl Ornaments – these little owls are a perfect fall scrap project

Mini Tetra Sachet’s – Make little sachet’s with the tetra tutorial. I’m using all sorts of herbs from the garden and throwing in some cloves too. I’m all about a seasonal smell.

little hand stitched squirrel

Forest Folk Sewing Pattern – it’s time to make the squirrels! I sure do love to put a scarf on somebody little…

colorful handmade pirate birds with fancy bicorne hats (you should make one)

this is why we can’t have nice things – beware of scammers

Important note regarding pirates! Not the fun kind. I sell patterns here, ann wood handmade, and also on Etsy. Nowhere else. Shady websites steal images from me and other small pattern designers. One of those sites is currently pumping out lots of Facebook and Instagram ads for sewing patterns. It’s a bait and switch scam – anyone who purchases from them gets nothing or close to nothing. I and other designers have reported them to their webhost and Meta (facebook and instagram). So far there has been no action taken by the host. Meta has removed the ads but not deactivated the ad account so be aware.

Incidentally International “Talk Like A Pirate Day” also lands in September – the 19th.  Find the template for the little bicornes here.

What’s your national sewing month project? Will you join me in making a scrap quilt? Are you in the mood for a scary book? Let us know in the comments. Happy National sewing Month to you!

make scrap fabric patchwork : recreational piecing

Plants and patchwork make me happy, I can’t get enough of either of them.

The process has an energetic phase and a meditative phase. The energetic phase is grabbing a bunch of scraps and piecing them together quickly. I find my results are most satisfying when I don’t over think this part. Join a couple pieces, iron your seams open, cut it up and join them again. Repeat until it’s as patchworky as you’d like. I make a pretty big mess when I do this.

baskets of scrap fabric being ironed and pieced together randomly.

Pro Tip: Load your machine with gray thread- it works for most fabric colors. Also keep your stitch pretty small. If you’re going to cut your patchwork up to make stuff it won’t easily fall apart before you assemble your project.

This quick paced piecing always gets my wheels turning. The resulting patchwork is a great start for all sorts of projects.

get the pattern button

patchwork project  ideas:

woebegone pines

scrappy trees 

needle books

mushrooms

It’s also a great way to start your 100 day stitch book pages 

patchwork cut into little square and rectangles on a cutting mat

Lately I have felt a strong spiritual directive to make some simple little pouches. That’s what got me thinking about patchwork this week. The next step was to cut my shapes.

That’s where the meditative phase begins. Before I start to assemble the pouches I’ll add hand stitching and patches. I want these tiny bags to feel layered and worked, the patchwork is a huge head start in that direction.

That’s my stitch plan for the weekend – slowly hand stitching this little collection of squares and rectangles. I’ll post some progress in my instagram stories.  And if the pouches are sweet I’ll post a tutorial soon. Stay tuned.

brown paper packages tied with bakers twine and decorated with stamps. Colorful post cards and fabric are tucked into the package.

Happy mail! Lots of mushroom sewing patterns are headed out into the world. Thank you!

Hot off the press! Don’t look directly at it… The Golden Sun Notecard is in the shop now.

What’s your weekend sewing project? Is there recreational patchwork in your future?

Let us know in the comments.

finishing the hundred day stitch book : suddenly a prawn appears

day 99!

There was no plan for a prawn. He just turned up. He was immediately preceded by an octopus. That’s what I love about an improvisational process. Ideas. One thing really does lead to another if you let it. You get somewhere new by starting without knowing, make a mark (in this case a stitch, a patch etc.) and respond to it.

day 99 2023

These undersea friends in hats bubbled up from somewhere mysterious. They inhabit a world that is rich and expansive idea-wise. I’m going to spend time in that world. This is my favorite thing to do in life.

day 95 2023

Daily practice has a serious slog factor. It’s often hard to show up for. Days inevitably get weird and busy and difficult. I’m blown away by how many of you showed up for this. The community as well as instagram and facebook is filled with those efforts. Thousands of stitched pages. The last of the 100 days is tomorrow. Wherever you are in that process congratulations on showing up and thank you for sharing your one of a kind imagination.

support the ann wood handmade free pattern library with a happy donation 

Support the 100 day stitch book project and the always growing free pattern library.

Click here to add your support.


finishing the book

To finish your book start here.

None of what I’m about to say will make any sense to you unless you’ve reviewed the assembly pages linked above. I started putting my book together yesterday and I’m assembling a little differently this year. It’s going to take forever, tons of hand stitching.

The difference is leaving the page edges raw. I did this in a workshop in France last summer and liked the effect. You can check that out here. (PS if you’d like to join me for France 2024 please use the contact form to message me and I’ll hook you up with more info)

It’s easy to do but the hand stitching on all those pages takes a while. If you’d like raw edges just follow the book assembly instructions and  at step 11 in the slot section you place the wrong sides of the pages together. And again for the tab section in step 9 you place the wrong sides together.

I put together my first two sections (according to the chart) yesterday. Checkout the demo below and then refer to the official instructions.

First you need to number the pages in the order you want them to appear in the book. 1 is the front cover and 20 is the back cover .

Then arrange the numbered pages according to the chart.

Sew the seams for the first two sets of pages (section 1 on the chart).

Press the seams open.

For the raw edge finish place the wrong sides together.

And hand or machine stitch around the edges. The tab and slot edges are not raw – they are folded in and should be whip stitched closed  – just follow the directions here.

Just like last year I’m a little happy and a little sad this is over.  Daily commitment is hard but once again It was so worth it.  How about you?  Are you assembling your book? Did you have a favorite  page?  Let us know in the comments.

textile book tutorial part two – making the sections

*  The tutorial is divided into 2 parts. Please read both parts entirely before beginning. Seriously, it helps. Start here.

The book has 20 pages, including cover and back. There are five sections – each composed of 4 rectangles/pages.

3 sections have slots.

and 2 sections have tabs.

This tutorial demonstrates how to construct the two kinds of sections in the book – slot and tab. Before you begin to sew the sections please read this post on how to create and organize the pages.

You will need:

  • your 20 pages/rectangles
  • chopstick or similar
  • a basic sewing kit
  • embroidery thread

make a slot section

1. To make a slot page take two rectangles and lay them out with the right sides facing you.

2. Place one over the other – right sides together.

3. Draw a half inch margin down the right hand side of the top piece.

4. Clip the short lines on your page pattern. Fold the center section back.

5. Place it over the rectangles and mark the short horizontal lines.

6. Sew the half inch seam above and below those marks.

Read More

lucky fish : slow stitch project

slow stitch scrap fish diy

slow stitch scrap fish diy

Who doesn’t need some luck? Plus these very simple fish are pulling me out of slushy, stubborn stuckness.

One thing leads to another, if you let it, but first you need to start. Where I really started was ironing, ironing scraps. It went on my to do list because it was an easy win (I felt like doing it). And I had saved a couple bundles of scraps, each sent by a friend, to sort and iron pre-move.

slow stitch fabric fish diy

As I ironed and sorted by color the wheels started to turn and I felt a strong and persistent spiritual directive to slow stitch some fish.

Maybe you feel like stitching some fish too. Let it be a meandering process, try stuff. Let one thing lead to another.

** DOWNLOAD THE FISH TEMPLATE **

You will also need:

  • fabric scraps – light cotton or linen
  • little scraps, buttons lace for embellishing
  • stuffing
  • a basic sewing kit
  • pencil

cutting out fabric fish shape

1. Pin the pattern to 2 layers of light cotton fabric – right sides of the fabric together – and cut out. Be sure to clip out the little triangle notches.

2. Mark the seam line lightly in pencil.

3. Stitch the seam by hand or machine, leaving open between the notches. Find hand sewing tips here. 

4.  Clip notches around the curves and clip off the points at the nose and tail. Be careful not to clip the seam.

5. Use a chopstick to turn the fish right side out.

6.  Pro tip: use a plastic mechanical pencil to push out the corners – retract the lead first.

7. Stuff your fish.

Read More

strange specimens and bird work

seedpod and lace fly

hand stitched mushrooms

Spongy and irregular. That’s what I’m looking for, in mushrooms anyway. Strange specimens, just yanked from the earth. I want you to smell the fungal forest air.

hand stitched mushrooms

little mushroom pattern.

hand stitched mushrooms

The fabric on the mushroom with the puffy and stripey undercap was made using the bleach printing method we talked about a few weeks ago. I did one thing differently this time and made the bleach marks with a paintbrush after sewing and before stuffing

get the mushroom sewing pattern

If you’d like to invent your own shapes and sewing patterns  good place to start with sculptural/ 3 dimensional sewing (like toadstools) is by experimenting with sewing spheres. Play with the edges, taper one end, experiment with the number of pattern pieces, cut them in half etc. and see what sorts of shapes you can create.

ann wood handmade sphere patterns

The free sphere template above will help  get you started. This mini seed pod is made from the 3 part sphere template (printed much smaller) and elongated a little at one end.

hand stitched botanical expeiments

seedpod and lace fly

Tiny fly inspected, tiny fly approved.

songbirds on my work table

sewing pattern for a textile songbird


I’m  working on songbirds too – made from antique garment scraps. The indigos are Japanese and the earth tones are mostly linings from edwardian dresses.

get the songbird sewing pattern

hand stitched songbird

What are you making? Have you tried the needle book or the tiny dishes? I’m putting together a post of things made from my patterns and tutorials. You can send photos to me at info at ann wood handmade dot com or tag your photos in instagram with #annwoodpattern.

the somewhat weekly newsletter

domestic sewing : confronting the throw pillow situation, a re-write and little paintings

vinatge and antique fabric pillows

ann wood's brooklyn studio

It’s pretty New Yearsy around here. I’ve got all sorts of plans and aspirations for the year ahead. Before the end of 2018 I made myself finish a personal project, I confronted some domestic sewing.

Like you, I wanted to start the New Year with a solid throw pillow situation. It has been kind of a mess for a while, definitely not bringing me joy. I had a bunch of ideas to make it better but they had been lingering on my someday list. For years. Deadlines are awesome. Making the dawn of 2019 the due date got me motivated to churn out some decorative pillows. Once I got going it was fun.

couch cover from antique grain sacks

And I made a cover for the seat too, from grain sacks I got in France last summer. They got super soft after I (machine) washed and dried them and I pieced my favorite parts together. They have lots of beautiful mending and I love the colors.

vinatge and antique fabric pillows

throw pillows

I made the pillow covers from old fabric from friends (including some glorious and ancient things my friend Ching sent me) and more things I picked up at French flea markets last year. By the way there is one spot open in each of my trips to France this summer  – click here for June 21-28  and click here for July 1-8. Come to France with me! And then go home and make some throw pillows…

ann wood in a mended dress

With the couch in happy condition my first official work project of this year was a long overdue re-write of my about page. Especially if you are a new visitor it’s a good place to start.

And also in the New Year’s department I re-committed to my daily painting and drawing project. So far so good. Daily practice is no joke, it’s brutal sometimes but I know I’m better off doing it in lots of important ways. The positive effects on my thinking, creativity, idea generation and focus are huge. I’ll scale back to drawing when traveling probably but if I flake on this again you should yell at me.

small art, made every day

The holidays were unusually happy and slow and peaceful for me. I spent a lot of it in pajamas eating cookies with a cat on my lap (I regret some of the cookies). It was pretty nice but I’m happy to be back to business as usual now. How bananas are you? I’m pretty bananas. I require huge amounts of time by myself to think and work and I like routine a lot. I’m luxuriating in time and space and ordinariness now, percolating all sorts of ideas….

the dastardly owl sewing pattern is in the shop

a sewing pattern for a dastardly owl

a sewing pattern for a dastardly owl

Make this owl. This imperious and condescending owl. He measures 9 inches tall  from disgruntled talon to sinister horn. And the pattern scales well if you would like to try a larger owl.

The PDF pattern download is 31 pages long and has more than 130 color photos.  You’ll learn how to construct the basic body shape and talons as well as my system for creating owl-ish layers of feathers and a dastardly expression. Every element is broken down into steps and fully explained.

page form the ann wood handmade owl pattern

a gray soft sculpture owl

owl sewing pattern back feathers

owl sewing pattern : stuffing the legs

The pattern has all the top secret tricks I’ve come up with over 12 years of making ill tempered owls. And I’ll share this one with you here:

When the layers are fully assembled spritz with water or spray starch if you like.

smoothing owl feathers

And run a hot iron over the feathers. I do it to his face too (so rude) to adjust his dastardly expression. It has a magic effect, un-ruffling the feathers and giving the layers extra owly-ness.

I’m so excited to share this pattern with you! I’m so glad it’s done! I can’t believe how much work it was!And I hope you make owls!


owl sewing pattern - wool scrap owl

the somewhat weekly newsletter

Do you get my free weekly-ish newsletter? There are tips and tricks, ideas, stuff to try, all the latest news and blogposts and extra stuff, just for subscribers, delivered mostly on Friday. Pretty much.


printing fabric with bleach for stitched mushrooms

The quest for the perfect organic dot fabric for toadstools is never ending, I’m always on the look out for fungal feeling dots, speckles and marks in general and I’m super particular. Shopping in LA a few weeks ago there was lots of nice batik stuff that was close but no cigar. I described my dream fabric to my friend Molly and she said “dude you could totally make that”. That is such a good attitude. Yesterday I experimented a little. And dude, I can totally make that, so can you.

making marks on cotton fabric with bleach

Gather some cotton fabric, bleach, wax paper and tools for mark making. I tried all sorts of things, rubber stamps, pallet knives, brushes, straws, cardboard, spools, on and on. Also put on an apron and some gloves and do this somewhere very well ventilated or outside.

marking with bleach on fabric using a pencil eraser

I had one little dish of straight up bleach (you just need a little) and another diluted about 2 parts bleach to one part water. I put wax paper under the fabric and started making marks. My favorite tools ended up being a pencil eraser, putty knife, a stiff bristle brush, a toothbrush for splattering and a little spool that I glued a piece of wool felt to one end of. A cork would have been good too – just thought of it.

spool with wool felt glued to one end for bleach printing

cotton fabrics printed with bleach for making fabric toadstools

The marks take a moment to begin to “develop”. I let most of the fabric sit for about 20 minutes before rinsing. I have googled/pinterested around and there are all sorts of interesting things you can do with this technique and you can get pretty fancy about it. Find a great tutorial here and another here. 

toadstools made from fabric

toadstools made from fabric, brown and red with spots

little mushroom sewing pattern


find the mushroom sewing pattern here

I love how they turned out, the bleach prints are so perfect for little fungi and there are endless things you could experiment with to make marks.


the somewhat weekly newsletter

Do you get my free weekly-ish newsletter? There are tips and tricks, ideas, stuff to try, all the latest news and blogposts and extra stuff, just for subscribers, delivered mostly on Friday. Pretty much.


pick up a thread and follow it, small stitch experiments

Part of the  day today was devoted to waking up the experimenter in me. It needs some encouragement so I gave it an assignment, an easy assignment. I’ve been filled with reasons why I can’t do things lately so it’s a baby steps approach: make something small, make something fun, start without knowing.

One thing leads to another, if you let it.  But first you need to start. Sometimes without knowing where you are going. If the experimenter in you needs some encouragement too please join me in the little assignment.

Start by gathering things, inspiration, things to think about and things to work with.  Arrange and rearrange and look for happy accidents.

fabric and found things for inspiration

ammonite fossil
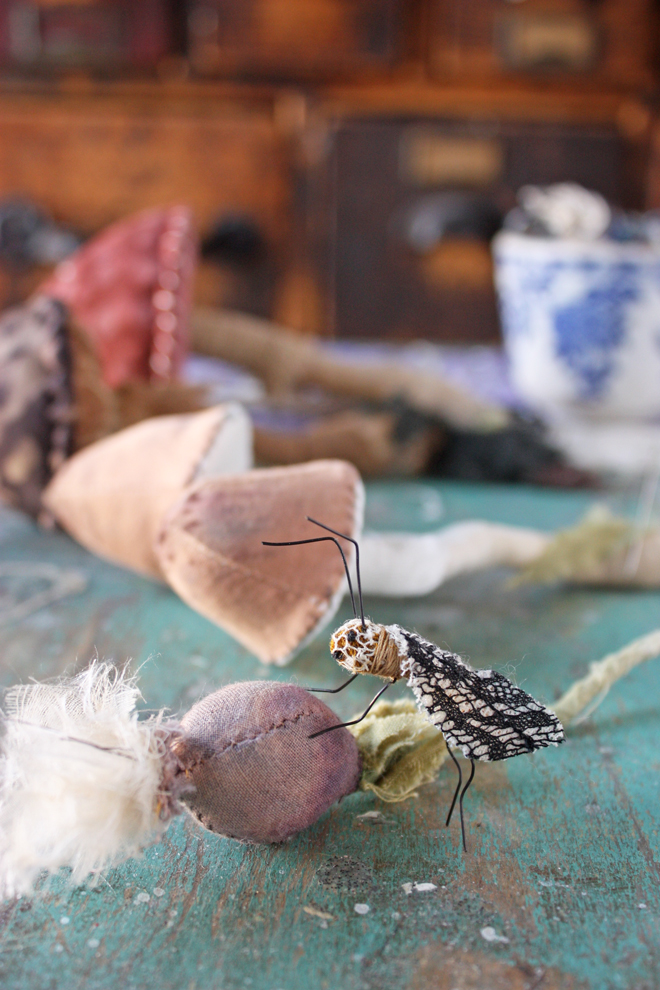
(P S – the fossil above is an ammonite. It was a gift and I love it.)

And then try something, listen for the whisper of an idea, pick up the thread and follow it. Follow it around corners and into shadows and back into the light. Keep following and keep responding and noticing.  Be curious.

There are no mistakes, only information,  a yes and, why not, lets see what happens process.

hand stitched amulets

I like what turned up today, my little stitch experiments feel like amulets to me. And they were indeed medicine.  I had fun and lost myself in the process. And I’m just getting started, the idea has momentum and there is lots more for me to explore here. If the amulet idea appeals to you as a shape for your experiments I hope you try it and I’d love to see what you come up with.

the somewhat weekly newsletter

Do you get my free weekly-ish newsletter? There are tips and tricks, ideas, stuff to try, all the latest news and blogposts and extra stuff, just for subscribers, delivered mostly on Friday. Pretty much.


an entirely satisfying activity involving scraps

lace scrap spools

garlands made from lace scraps

All you need are scraps. And a sewing machine. It is the kind of thing you could lose yourself in, the next thing you know hours have gone by and there are miles of it. It’s a meandering process and an invitation to happy accidents, there are no mistakes, it is not careful (except keeping your fingers away from the needle) and there is no planning. The perfect thing if you are feeling the need for something spontaneous. Just start and keep adding stuff.

garlands made form little scraps of fabric and lace

My approach was pretty bare bones and I had lots of fun. What is your scrap situation like? I’ve got tons and lots of it very small.  I dumped the whole thing out and started pulling out the tiniest scraps, the un-sewables, the little whispers I can’t let go of.

 garlands of scrap lace

Start with one piece, add another and another, machine stitching through the whole thing, sometimes bunching or curving the little pieces. I can’t stop. And they don’t need to be lace, I’ve got cotton scraps too and I’ll try those next.  And you can add other stuff and get super intricate and detailed – find a tutorial here.

You could use the garlands for packages or hang them (maybe with some twinkle lights and paper mache ships) or stitch them onto doll clothes or your clothes or make a crown for somebody little.

I made a mini one  to use as a roiling sea for this little boat.  Find the free mouse pattern here and the free  little boat pattern here.

very nice mice free sewing pattern     

woodshedding birds and owls

hand stitched birds

hand stitched birds

I’m in the woodshed with songbirds. Evaluating the pattern and steps, testing and adjusting little things – using what I learned teaching the workshops last month to make the pattern all I want it to be.

pale blue textile bird

My friend Mickey introduced me to the term woodshedding and I love it:

“The ability to conjure up a feeling of wonder in others, to create a sense of awe, has always fascinated me. And while I do believe that magic can just “happen” under the right circumstances, creating magic is a much different story. It involves a lot of hard work, endless study and a constant refining of process and craft. In music, they call these periods of intense practice woodshedding, referring to the time spent honing skills privately out in the woodshed.”

Mick Riad  –  Creative Director, Fortuny

I think it is my favorite place to be, in the woodshed with something. Discovering, testing and refining. Deep in a learning process.

handstitched birds on my worktable

crimson and puce bird

hand stitched bird details

velvet fortuny owl

I’m also woodshedding owls to prepare for the dastardly owl workshops this fall (I think there are 2 spots left).  Eventually they will also become a pdf and print pattern too.

What’s going on in your woodshed?

Update – the songbird and owl patterns are available in the shop now:

a sewing pattern for a dastardly owl      sewing pattern for a textile songbird