Category: other creatures

picnic bugs : a free and easy sewing pattern for a silly bug doll

free bug doll sewing pattern

free bug doll sewing pattern

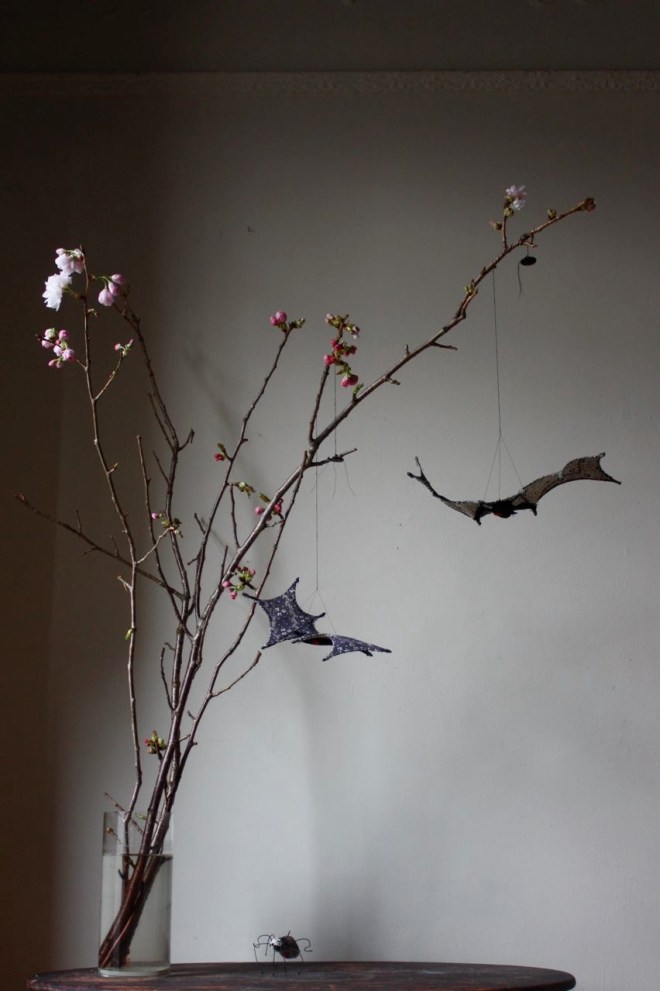
You have probably seen these guys, they show up frequently at picnics (hence the name). They don’t come to pester, just to say hi. They’re friendly like that. Aggressively and relentlessly friendly. They don’t even get mad if you put them in a jar. Just take them to a picnic once in a while.

Good things come out of play. These guys turned up a couple years ago in a silly bug experiment. They crack me up. And they’re a perfect scrap project – you only need a little bit and a mismatched variety is nice. And they make a silly and sweet surprise for somebody little’s lunchbox.

sew a silly bug

make a picnic bug:

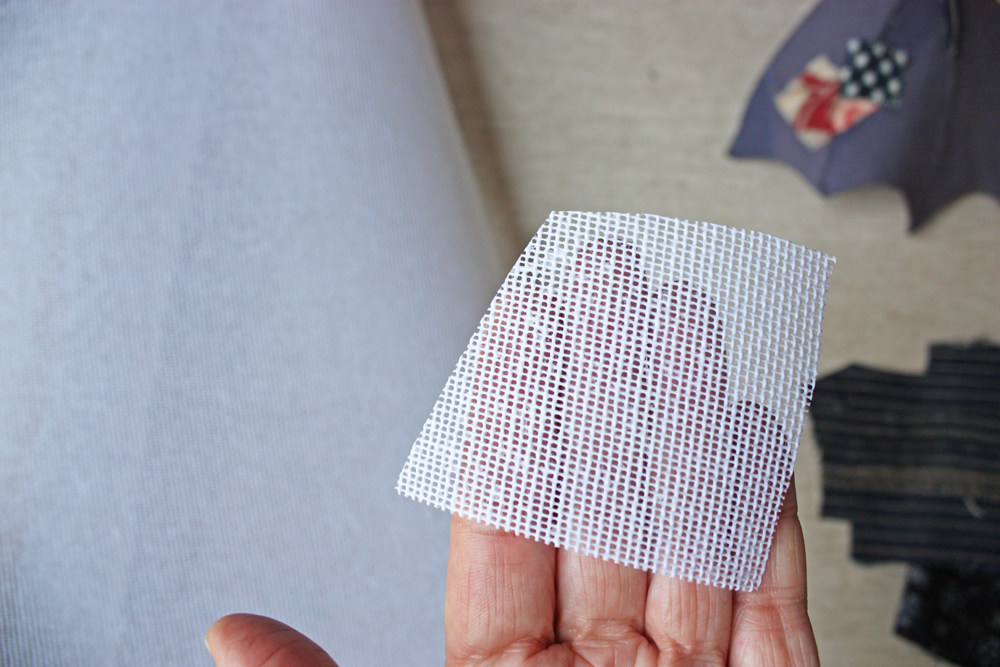
download the pattern

You will also need:

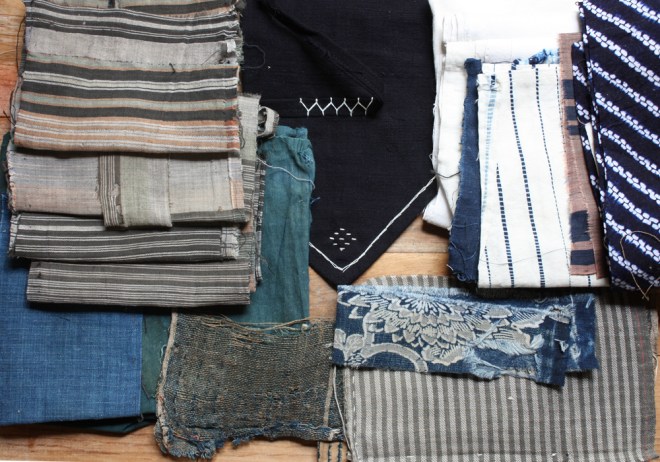
  • fabric scraps – I used cotton and linen
  • twine or yarn for legs
  • stuffing
  • large embroidery needle
  • a chopstick
  • a bamboo skewer
  • basic sewing supplies

1. Cut out the body and eye pattern pieces – pin to doubled fabric with the right sides together and cut out. Pin the stomach pattern to a single piece of fabric and cut out.  Note – the wings are double sided so you’ll need 4 pieces – 2 for each wing. I used 2 different fabrics.  Pin the pattern to the 2 layers of fabric with the right sides together and cut out a wing, then flip the pattern and repeat for another wing.

2. Cut a slit in the stomach area of the body pattern for turning and stuffing – make sure it’s smaller than the stomach cover.

3.  Mark your quarter inch seam allowance on the fabric (really – it helps a lot). Pin the two body pieces with the right sides together and  sew all around the body.  Pin two pairs of wings with the right sides together and sew – leave open as shown.

4. Clip little notches all around the body and wings being careful not to cut the seam. Clip the points off the wings too and clip along the curve.

5. Turn the body and wings right side out. Run the chopstick over the seam inside with firm pressure on the body and wings. this helps open the seam for a smooth shape.  Press each piece.

6. Stuff the body – I’m using wool stuffing.

7. Stitch the stomach closed. this will not show. Don’t pull the stitches too tight – just enough to close. Stitch the wing openings closed too.

8. You can use you large needle to move the stuffing around and fine tune – this helps fill out the curves.

9. Pin the stomach and eyes in place and whip stitch around. Optional- whip stitch around the wings with a contrasting thread.

10. Stitch and elongated X for each eye and a little W between for a mouth.  I also added a few horizontal stitches on his neck.  For tips on hiding your knots see this post.

Read More

bundling up the tiny doll folk and imagining their world

embroidered felt doll hats and jackets

embroidered felt doll hats and jackets

When faced with a stressful situation small sewing is good medicine. This weekend we made some big tech improvements to ann wood handmade that were sort of terrifying. I’m thrilled with the result – especially the speed.

embroidered doll cap

While all the scary work was being done I lingered in the details of tiny felt jackets and hats and slow stitched talismans. Besides needing to distract myself from the website work it has been cold and snowy, all the more reason for cosy hand sewing and bundling the little dolls up. I sure do love to bundle things up.

small stitch experiments

embroidered felt doll jacket

tiny rag doll that fits in the palm of your hand

Find the free little jacket pattern here and the tiny doll hat here.

The folky little winter ensembles make me curious about tiny doll world, the details and history. I’m going to investigate that over the next few weeks. You may recall I explored the world of a family of cosmopolitan ants a couple years ago.

beaumonts christmas

ant family christmas

It was probably the most fun I ever had. I’m looking forward to imagining a world for the tiny doll folk. Stay tuned.

it’s time to make the squirrels, stitching expressive creature eyes and wool stuffing in the shop

little hand stitched squirrel

little stuffed squirrels and whale ornaments on my work table

It is time to make all the little things, the little gift and ornament things. It is officially time. For those of you less procrastinatey than me it is way past time, I know you are out there, you organized types who start in June. Maybe I’ll turn over a new leaf this year, I would love to be done making my Christmas stuff by Thanksgiving.

little hand stitched squirrel

little stuffed wool squirrel

forest folk sewing pattern


Today I’m making very little squirrels, and thoughtful whales. This squirrel is just the right size for somebody’s pocket. He looks very happy in there.

get the forest folk pattern

stuffed wool squirrel in my pocket

He is a relentlessly happy little fellow.

whale ornament eye

For most of my small creatures I make the eyes the same way, a disorganized little cluster of stitches (you can see how I hide my knots here). On wool I use embroidery thread so it shows but on cotton I like the subtlety of sewing thread. And I find the less I think about the placement of the stitches the better, the more expressive the eyes turn out. This little whale has things on his mind.

squirrels and whales on my work table

adjusting stuffing placeement with a large needle

I stuff all the little folks and creatures with the loveliest wool stuffing. I spend a lot of time stuffing things, getting it just right and almost always fine tune the shape from the outside with a big needle.

Have you tried wool stuffing? it is all I use and I’ve added it to the shop in 4 ounce packs – that’s enough wool for lots of little creatures.

Are you sewing for the holidays? What’s on your worktable?

the somewhat weekly newsletter

Do you get my free weekly-ish newsletter? There are tips and tricks, ideas, stuff to try, all the latest news and blogposts and extra stuff, just for subscribers, delivered mostly on Friday. Pretty much.


a creepy retrospective

the haunted house and other spooky poems

When I was small there was a record I loved. A collection of creepy poems read aloud in creepy voices. I have thought of it often but never expected to hear it again. I did this April. I guess just about everything is on the internet now. I have intense memories of these poems and the sensation of hearing them again is hard to describe. They terrified me as a child and I could not get enough. Now when I hear them I see the old record player, the worn carpet and the dusty, dappled light in the front room of the shady little house. It stirs up all my ghosts.

the haunted house and other spooky poems

If you’d like to hear it’s all there, on youtube. My favorites are The Erlking and Dust. I still love the recording and I wish more of the world could be delivered to me in rhythmically crackling record with old-timey voice format.

Happy Halloween and in honor of the spooky day a creepy retrospective.

spiders!

spooky cardboard castle

once I loved a spider

dastardly owls

shadowland

“A woman drew her long black hair out tight
And fiddled whisper music on those strings
And bats with baby faces in the violet light
Whistled, and beat their wings’ – T.S.Eliot

gunderson and snodd, a plum bat and other creatures

ann wood owls back

* The owls and everything below (plus some lambs in pants) are in the shop now.

Meet Mr. Snodd and Mr Gunderson. The best of friends.  I spent the last couple weeks finishing things, getting almost done stuff across the finish line. It clears out so much brains space. And I love the sensation of crossing something off the list.  I’m shifting my focus now to last minute workshop prep. I did not achieve the dream of being fully prepared  a week ahead of time but I’m in better shape than I usually am this close to leaving. Progress, not perfection right?

ann wood owls back

hand stitched bat

hand stitched bat

This plum bat is the second one I’ve made with the new method and I’m happy with it.  There are still some complications and difficulties I need to get rid of though before I can think about turning it into a sewing pattern.

paper mache ship and owl

The ship above is made from the small ship pattern.  And the gentleman sailor owl is the small size from the little owl pattern.

paper mache ship and owl

And a slate finch. I wish you could feel her velvet head.

slate finch : handstitched songbird

ann wood songbird

antique lace

antique lace

I’m spending the rest of the day sorting through mountains of fabric and lace to decide what’s coming with me. Some will be for workshops and some for the Squam Art Fair. I’ll be there with sewing patterns and some vintage supplies. Or just come say hi. If you do please bring me a beer (the keg is by the door).


margin – or, panic early

I first published this post more than two years ago. In all of my 11 years of blogging it is one of my favorites. It is also still my biggest struggle. I’m sharing it with you today for two reasons:

  1. For the first time in a long time I haven’t got a blog post this week. I’m occupied with filling orders, details for upcoming workshops and beginning to plan new classes and workshops for 2018 (including at least one in Europe…… stay tuned).
  2.  The message, the idea of margin, is one I need to hear and apply again and again but especially right now. It boils down to this – when there is certainly and officially too much to do – the only sensible thing is to decide to do less. Ideally before it gets decided for you.

I’m forcing myself into my high gear, last minute place, that magic spot where priorities are crystal clear and hard decisions get made easily. I’m forcing myself into that place a little early so the week before I leave to teach I’ll be one of those super chill prepared people. For the first time. Ever.

(This post was originally published April 2015 – I’ve updated with images of preparations for my natural history workshop)

Had I already mastered the idea of margin in my life I wouldn’t be editing this post 20 minutes before I need to publish it. But I have not mastered margin, not at all. Margin is the space between, the room left for error or chance, the cushion, and I rarely have any. I’m the guy hand making one more Christmas gift at 2 AM on the 24th, 10 year old me was adding glitter to my styrofoam ball planets on the bus to the science fair. It isn’t really about procrastination (although I’m great at that too) – it’s more – I see some space, some room and think “why not add something?! Why not make it better?! Let’s do both!”.  It is a kind of misguided enthusiasm – it’s hard to say no to something I’d love to do even when I know there isn’t enough time. It also comes from fear of lack – fear that the universe will find me ungrateful and opportunities will disappear, it’s living in fear, fear of scarcity. And I am a wishful thinker, I catch myself all the time planning for things to go perfectly, filling every possible moment with commitments, scheduling things back to back or overlapping. It feels like I’m being diligent, a hard worker, but I’m setting myself up to fail – when there is no room for error some little thing, like the printer breaking, can become a huge deal.

When you have margin you have options – so often in this life that I supposedly designed to afford choice I feel I have none. And I need to fix that. Fix it or miss out on my best work. Fix it or be swept along in the chaos – just reacting to emergencies.

I came across this article recently and for some reason it penetrated in a way that the idea just hasn’t before. It got my attention and it stuck with me and I understand something new: margin isn’t something that happens when things get magically better, it is a decision.

It’s a choice.

It’s a choice and a discipline, something you plan for. I don’t have a busyness problem I have a decision making problem.

It sounds simple – just plan for extra time  – but It means fighting against life long inclinations and habits, the temptation to fill every available minute is strong. My first move in the right direction is to figure out how to take one day a week completely off. Oh boy. My current situation is so far away from that I can barely get my head around the idea and at this point I think it’s going to take a while to make it happen. I’m hoping for progress, not perfection, for improvement, some sense that this is attainable for me.

So much of the new stuff I’m trying is working but I think this one issue is the lynch pin, the biggest obstacle, the thing between me and real improvement in my work and my life.

suddenly a billy goat appeared and the space between ideas and action

billy goat rag doll

billy goat rag doll

Suddenly a billy goat appeared. A very distinguished goat. It was not my plan, he is not on my list or schedule and I probably should have been doing something else. But I felt a strong spiritual directive to make a surly goat. I had the impulse and I followed it immediately, that hardly ever happens and I think its a good thing to do. I usually have quite a lot of time between my ideas and when I do something about them. Sometimes they get stale – resistant to action. Maybe too much time lets doubt creep in or I get stuck in an endless circle of overthinking. There is huge value in diving right in, creating the first iteration, maybe making a mess but also getting a feedback loop going. I’m pretty sure there is some actual brain chemistry around this but I haven’t looked it up yet – I was busy making a goat.

billy goat rag doll

I made my gray goat rag doll from an Edwardian skirt. I used the aristocratic lamb pattern with some adjustments to the head. I’m working on another in black now (and I do plan to release this as a sewing pattern).

billy goat rag doll

small art

Goats have been on my mind, turning up in my little paintings often (by the way I’m adding new small paintings every Thursday – including the goat above). And I’m working on some tiny goats for a project I’ll show you this fall. I love their expressive, humany faces. They always look like they are silently judging you.

This goat  be in the shop next week – I’m thinking Tuesday – with some other recently finished things including some Sri Threads songbirds.

You can sign up here if you’d like an email when the new things are available.

bird, hand stitched from japanese textiles

bird, hand stitched from japanese textiles

Update: If you’d like to try making your own songbird you can find the sewing pattern right here.

confronting the pigeon : progress on my city bird

stitched pigeon progress

I like pigeons. I like the city beasts.  And I have an affinity for the less loved creatures, ants bats, rats, mosquitos etc. Pigeons fit right in.  What I love best about them is that they manage to be imperious and goofy – all at the same time.

So I want to make a pigeon. I stalled in the muslin draft phase. Stalled real good. The universe keeps sending me excellent pigeon fabric though. Maybe that’s why I got stuck – couldn’t choose. There is also a little anxiety about when to move out of prototyping – and all the freedom and experimenting that affords – into trying one in beautiful pigeony fabric.

stitched pigeon progress

I ended up deciding to combine a mix of collections in a way I don’t very often. I used Fortuny for the body and will use it for the feet also, an Edwardian pinafore and other garment scraps will be feathers and some beautiful teal from Sri Threads for the head.

stitched pigeon progress

The teal is what finally got me to take a shot at turning out a finished bird. It arrived lately with some other magnificent pieces and I couldn’t resist trying it. I’m happy with the shape and I’ll move into details this weekend and start a couple more too – using more of the exquisite things from Sri.

sri threads textiles

A condescending yet vacant  pigeon or two should be forth coming.

botanicals, bats and my new favorite supply – buckram

bats and botanicals

Have you ever tried Buckram? It’s a millinery supply. I’m continuing to experiment with bats and for this patched plum bat I’m trying buckram as a substrate – something to give it sculptural form. You can find buckram on Etsy – and it comes in all sorts of variations – black, white, heavy, light, fusible, sheets, rolls etc. etc.  I got a big roll of the heavy weight – non fusible  – in white. I’m also a big fan of millinery wire – there’s some of that in this bat too.

buckram

You can get buckram wet and form it or cut darts and stitch though it – I stitched it both by hand and on the machine.  I like the stability of the shapes I made (you can layer it for even more stability)  and how easy it is to stitch through.  I did need to cover the edges – they are a little sharp and my fabrics were particularly delicate.  I’ve been intending to try it for ages – it’s good stuff!  And has given me all sorts of ideas. I’m going to add it to the resource list. If you’re curious about it search on google and pinterest – for buckram and hat making – interesting stuff pops up. There is a lot to be learned about shape building from milliners.

I’ve  also been working on botanical experiments, revisiting two exotic species I created last year – The Royal Cone Flower and a Cloaked Bishop Lilly.  There are colors and color combinations I come back to again and again – deep smokey plums and violets, indigo, and greens with a little acidity to them and little bits of crimson.  The plums, violets and indigos are almost always Japanese (courtesy of Sri Threads). The crimson touches on the bat and Bishops Lilly are both very old – 18th and early 19th century.  I dye most of my greens and it’s always too dull for me so they get a quick second dip in sunflower yellow.  My favorite dyes are Dylon and idye (idye is intended for the machine – but since I dye tiny things in delicate ways I cut the little dissolvable packets open – it’s messy but works and their colors are great.

stitched botanical experiments

royal cone flower

And toadstools – little guys – mini versions made from the mushroom pattern printed at about 70%  (it scales up and down well). I love the mini- ness – just big enough for the palm of your hand or pocket. everybody needs a lucky mushroom in their pocket – especially in the spring.

mini toadstools


bats and perseverance

bat work

bat work

I have been bothered by bats for a very long time.  They were one of my first stitched creatures. I love them but vowed to never make another.  The process was brutal on my hands and had a high late stage failure rate.  And they took an outrageous amount of time.  But I love them, I love their shape, their curves and the way that shape seems to change as they twirl in the breeze and the lovely shadows they cast.

stitched bat

So lately I started from scratch – a whole new method of constructing them.  There have been several dismal failures but in the past week I’ve landed on something good -. It’s much easier hand-wise and the result is reliable and consistent.  It still takes forever. Not as bad as the original bats but still problematic.  I’m not sure I can get to a place where I can produce them with any efficiency but I’m not done trying.

stitched bat

edwardian bat

an aristocratic lamb : how to create texture with fabric

lamb rag doll

lamb rag doll hooves

An aristocrat, from the tips of his well manicured hooves to the perfectly coiffed curls of his head. I can see his whole world – the crumbling manor house,  stern ancestors glowering down from the walls,  the dim and dusty library,  his ever-present walking stick and far away gaze. The once stately gardens are a little more overgrown every year but he either does not notice or does not care.  All is well, he has his books, his tea, his evening walks and his memories of his youth and the sea.

lamb rag doll

lamb rag doll

I will probably not make another like him – his luxurious texture has been tormenting me – it took ages.   I’m never doing it again.  I might do it one more time.  I like the technique and use it often for small things but there was a lot of lamb to cover here. If you would like to similarly torment yourself  I took some progress shots along the way.

ruffle fabric

I start with long strips of light fabric – a cotton voile in this case – and about 1 and 1/4 inches wide. My old White Rotary has an awesome ruffle attachment or you can achieve the same effect (on light fabric) by turning your stitch size to the largest and the tension to the highest setting. I stitched just off center.

lamb ruffles

Fold the ruffled strip over at the seam, press and start stitching it on – whip stitching over the seam. Row after row, around and around.  In the photo below you can see how much space there is between rows. This varies depending on the size of the project and the ruffle – for my fancy lamb it is between 1/4 and 1/2 inch – I get a little closer in curvy places.

lamb ruffles

lamb ruffles

And at last the fun part.  When he was all covered I gave him a serious haircut.  Holding the scissors parallel to the ruffled surface start snipping.  You can do a little or a lot – I did a lot.

lamb rag doll


the somewhat weekly newsletter

Do you get my free weekly-ish newsletter? There are tips and tricks, ideas, stuff to try, all the latest news and blogposts and extra stuff, just for subscribers, delivered mostly on Friday. Pretty much.