You can find all the patterns for the projects below in the shop or on the free pattern page.
Magical and imaginative work by customers and readers. I’ve added links to the maker wherever possible – check them out – the mushroom below (little mushroom pattern) and gorgeous photo are by Trish.
crow by gill
crow by anni
Crows by Gillian and Anni the wing details are fantastic!
Did you know that the paper things they put on turkey legs are called frills? And/or booties. That’s the official name. I’m a little disappointed, I thought it would be a fancier and more obscure sounding word. If I was in charge of naming them it would be something like bufflenotters or tipplewads or whimploons. I think whimploons is perfect – who do I need to get in touch with to fix this?
This was on my mind while I was making you something fun for the holidays. It’s silly. And super easy and fast to make. It will delight somebody little or somebody big. You probably have everything you need to make it – just some brown for the turkey part and some white for the whimploon.
let’s make turkey leg treat bags
you will need
the template
a basic sewing kit
fabric scraps
ribbon, twill tape or cord
large safety pin
optional – a tiny bit of stuffing
1. Pin the turkey and frill templates to doubled fabric – right sides together – and cut out. Also cut a strip from the turkey fabric that is 2 inches by 12 and 1/4 inches.
2. Mark the seam lines on the turkey and frill.
3
4
3. Fold the end of the strip 1/4 inch.
4. Fold it 1/4 inch again and stitch along the fold. Repeat the 2 – 1/4 inch folds for the other end but don’t stitch it yet – just press.
Support free patterns like turkey legs! It’s been a priority here for years to create high quality free patterns (there are tons) on an ad free site. There are not very many of those left… Help keep the awesome free projects flowing.
5. Fold the strip in half -wrong sides together – and press. Sew the frill seam– leave it open at the top and sew one side seam on the turkey leg.
6
7
6. Press the top 2 inches of the seam open.
7. With the right side of the fabric facing you pin the strip to the edge. Begin at the seam line – 1/4 inch in from the edge. The folded edge of the strip is on the bottom and you’r matching the raw edges of the leg to the strip.
8. The other end of the strip needs to end 1/4 inch from the edge. Adjust if needed then stitch the fold in place. Pin it to the edge.
9
9. Stitch together at 1/4 inch.
10
11
10. Clip notches around the curves of the frill.
11. Optional – add a little stuffing. If you do it should be pretty minimal and leave the top 3/4 inch empty.
12
13
12. Pin the frill inside.
13. Fold the turkey leg sides together and pin.
14
15
14. Stitch the side and bottom seams.
15. Turn right side out and unpin the frill. Run a chopstick firmlyaround the seam to push out the curve.
16
17
16. Attach a large safety pin to a cord or ribbon. You need about 25 inches.
17. Feed it through the top channel.
Fill your drumstick with treats or treasures and tie shut.
I hope you stitch some drumsticks and happy Thansgiving!
Sleepy eyes and dimpled knees. The knees are everything… The first in the French Circus ragdoll series is available now as a pdf pattern. There are more than 70 instructional color images, full size templates and an online list of resources.
It’s super easy to make and can be sewn by hand or machine. The construction is simple and perfect for beginners.
FAQ
Will this be available as a booklet?
It will but those take forever to make – hopefully by the end of next year.
How long does it take to make?
Not long at all. Finish it in an afternoon.
How big is the elephant?
About 11 inches tall finished.
What fabric should I use?
Something soft is really nice. I used scraps from an old linen duvet for one. I love Robert Kaufman Essex Linen. It’s s cotton linen blend- washing it first makes it softer. Thrifted clothes are a good source too. I’m working on another now made from an old quilt.
Improvisational stitch – find a cozy spot and some scraps- stitch without a plan. One thing leads to another if you let it. This kind of “yes and” stitching always grounds me.
What is it for?
It fuels everything, directly, in generating ideas, and indirectly, in strengthening or revealing connections to intuition.
Watching yourself work like this gives you lots of information about how you think.
Hand stitching is a particularly effective way of recording moments. It creates a time capsule. A snapshot of your process in a particular moment.
Plus it’s a scientific fact:
“A middle aged craft lady at rest tends to stay at rest and a middle aged craft lady in motion tends to stay in motion.”
This kind of stitching is super easy to start and gets you past stuckness and inertia.
Paper mache – all those little pieces of paper, the rhythm and quiet focus. The little boat above or this teacup are both perfect weekend projects.
Or vacuum – is it just me? I find a magic combination of repetition and low key presence.
The same for recreational ironing – not my clothes ( I’m permanently, slightly disheveled)- fabric scraps – all sorts.
Make a gift – the time is upon us. Lot’s of little owls would be nice and they work well in batches.
Smell the November air – it makes such a brief appearance. I’m a such a smell person. If you are too simmer some cloves and orange peels for extra joy – such a cozy aroma.
Play with paint – Artist and Gardener Lorene Edwards makes daily color studies. I love this practice and how much there is to see when you really look. How zooming in changes things. Find her instagram here and checkout her website here. Pick up a leaf or a rock or an acorn etc. and make an appointment with yourself to try it out.
Gratitude is transformative. Always. Annoyingly so. I make a list every single morning. Before coffee even! That’s really saying something… And in challenging moments especially I count my blessings aggressively.
Let’s start with the foundation quilt. There has been a missing ingredient – something just wasn’t gelling for me. The goal is super simple, a scrap quilt with fleamarket vibes but sturdy enough to really use. I love pulling out random scraps and not thinking much about the composition of the blocks. It’s definitely driven by chance. But some element of texture or color or something was missing. The scraps from making circus animals were the answer – yarn dyes.
I love the mix of yarn dyes and vintage prints. and the washed yarn dyes have a super soft feel. They are a combination of linen and cotton that’s just right. Robert Kaufman – Essex Yarn Dyed – PS this is not an affiliate situation – it’s been a favorite for years.
I gave the quilt a solid chunk of time this week – ironing and stitching on auto pilot. I can see the finish line from here and it will get a couple more chunks this weekend. Still not sure about the size- something throw-ish probably.
the next sewing pattern – sneak peek
To date, all my sewing patterns have seam allowance included in the pattern. The Circus Elephant will not and here’s why: It works better that way. The elephant (as well as the other circus animals) are not gusseted.
The construction is simple so the pieces are cut together and stay together. In the case of birds and owls it’s very important that the edges of the fabric match repeatedly so perfect seam allowance is key. For the circus animals the silhouette is everything so I focus on everybody getting a perfect seam line. The resulting dolls have had 100 % accuracy and it’s faster.
What’s the best way to add allowance? It is a fact that some people just magically have an internal ¼ inch seam allowance. They can just cut. For most of us I think it’s a best practice to measure – make little dots every inch or so to guide cutting. I find it easiest and super quick to use a little paper with a ¼ inch mark. It takes very little time and makes a perfect result.
mark the dots
cut the piece
other elephant rag doll supplies
*This post contains affiliate links – meaning I get a small commission if you purchase through the link – affiliate links are below and marked with an *asterisks
It really helps to have a turning tube for the trunk. You can use a big straw and chopstick or get a set- *this is the set I have. If you haven’t tried turning tubes check out how they work here.
And disappearing markers for marking the seam line – there are lots of different options- I like all of these. I came to disappearing markers late in life and I’m totally sold on them- so much smoother than a pencil or tailor’s pencil and you get a nice clear line.
*mark be gone – I love the dual option – air and water soluble
*leonis – super handy size and some to give to friends
*sewline air erase – I love this pen – the only downside is it does disappear on its own- but if you’re working quickly it’s great. It was my first and it’s still my favorite.
And fabric- I used Robert Kaufman – Essex Yarn Dyed- Graphite for the body- you can find it in lots of shops. Thrifted clothes are a great source of fabric too. 1/4 yard gets it done but I would get 1/2 yard.
You may recall that there is a new creative prompt every month in the stitch club community. This October prompt was “potion”. I love everything about Pam Q’s hand stitched interpretation.
It’s the perfect time to make a crow. So Halloweenie! And take your crows next level with a costume, make a super quick and easy ruffled collar and pointy hat. Check out both sewing tutorials below.
1. Cut a long strip of light weight fabric. The strip should be 2 inches wide. I needed 45 inches to make a ruffle that fit my crow. The piece does not need to be continuous – you can join strips if needed.
2. Fold over the end, make a stitch and knot. I’m using DMC8 embroidery thread. Begin to gather by making large stitches and pulling to ruffle. Back stitch every couple inches to lock in the gather. PRO TIP – You can gather on your sewing machine by turning the stitch size to the largest setting and the tension to the highest setting.
3.
4.
3. To add to the strip fold over the end of another strip and overlap with the original strip. Make one stitch to knot and keep gathering.
4. Test your ruffle for fit.
5.
6.
5. When your ruffle is long enough to fit around the crow’s neck trim off the extra, fold the edge over and stitch. Optional- add a button.
6. Fold the ruffle at the seam and press. Trim the edge – trimming is also optional but it does give it a more elizabethan and structured look.
7. Add a ribbon to the the end ( or to both ends if not using a button).
Finished! Wind the ribbon around the button or tie a bow.
We did a bunch of exercises to spark ideas and connect with imagination. The point is to get past overthinking and judgment and dive right into action. It’s fast paced and playful. Play is creative. Clenching down hard on trying to make something awesome often isn’t and is not usually effective at bringing your personal magic into the world.
The first exercise was a mysterious box… Each person gets a little box of supplies. Everybody had 30 minutes-ish to respond to a prompt and make something. The prompt was – MOTH.
You can use only the things in the box and basic cutting and attaching tools. We had gluesticks needles and threads, scissors and exacto knives.
This is great to do with a friend either in person or by snail mail – you can create supply boxes for each other and do it over zoom or full on correspondence style.
And we made medals – awards, decorations and citations! This is a rich area for inspiration. We offered a bigger variety of materials and time. We had lots of trims and notions, vintage buttons, scraps, crepe streamers, an abundance of collage materials and paints and markers. Plus pins and some charms.
Making the medals dropped me into an imaginary world with all sorts of made up, stodgy and silly honors like : The Moth of Distinction (given only every 14 years), Golden Fungi, Outstanding Cat Lady, National Treasure etc. etc. I could go on forever. I probably deserve a medal for it.
Maybe you know somebody who deserves an award? This is a great group project with everybody contributing supplies and meeting for a couple hours.
more september project ideas
Golden rod dye – like lots of things in life I found it smelly but good. It’s just starting to bloom here and will be in abundance soon. It delivers a beautiful gold color. You can find more about my experience here and here is a tutorial here with all the DIY details.
Bookmarks – get out your wool scraps. I love these flowers and these simple heart corners. Speaking of books – my friend Katy and I are narrowing down the October scary vintage book selection for this year- stay tuned. Currently still reading the epic Pachinko and finishing Night Watch.
Wool pentagon sewing box – another great scrap wool project. Find the huge tutorial here. And while you’re there checkout the wool penny situation.
Mushrooms! I love these scrappy calico fungi by- Sarah.
The pages traveled with me all summer and were assembled a little bit at a time by hand. I love the finished book, it feels substantial in my hands, and it’s evidence of how powerful small, consistent daily effort is. I’m already looking forward to the 2025 stitch book challenge. Look for details at the end of this year.
Circus folk sewing patterns are in the works. The dancing elephant will be the first released this fall. I’m making lots of circus dolls in preparation for the workshops in LA. I learn a ton in the production phase- after the pattern templates are pretty solid – just churning them out and making little adjustments, trying variations etc. It also helps zero in on the best material choices and testing hand sewing and machine sewing. All super valuable for the workshops and sewing patterns.
I also love this kind of production work. In short spurts anyway. I haven’t had any sewing in the shop for ages and some of these dolls will be available in the shop this fall.
bachelor buttons
Bachelor Buttons were the clear winner in the garden this year. Nobody ate them and they didn’t get any weird plagues. The color is unimaginable. They are definitely on my list for next year. I was also delighted by Mexican Sunflowers and Nasturtium leaves.
creative sparks
A place to start. We have a new one in the Stitch Club every month. The creative sparks (prompts) are medicine for stuckness. They give you:
– A place to start, a shape to contain your ideas. The spark gives you a specific starting point, that’s magic when you’re feeling stuck. The little push drops you into the process instead of waiting for inspiration.
– A fresh perspective on ideas you’ve been sitting on but haven’t gotten your hands and head around yet. A completely novel intersection can appear.
– The spark can push you to explore new themes and styles, expanding your creative and visual vocabulary.
– In the community there is a sense of shared experience and energy. The Sparks have been huge for me – the circus patterns, my workshop at Squam all incubated in creative spark work.
Give it a try – last month’s creative spark was MOTH. I’ll show you some moth inspired work when I get back from Squam.
favorite painting supplies
*This post contains affiliate links- meaning I get a small commission if you purchase through the link. They are marked with an *asteriks.
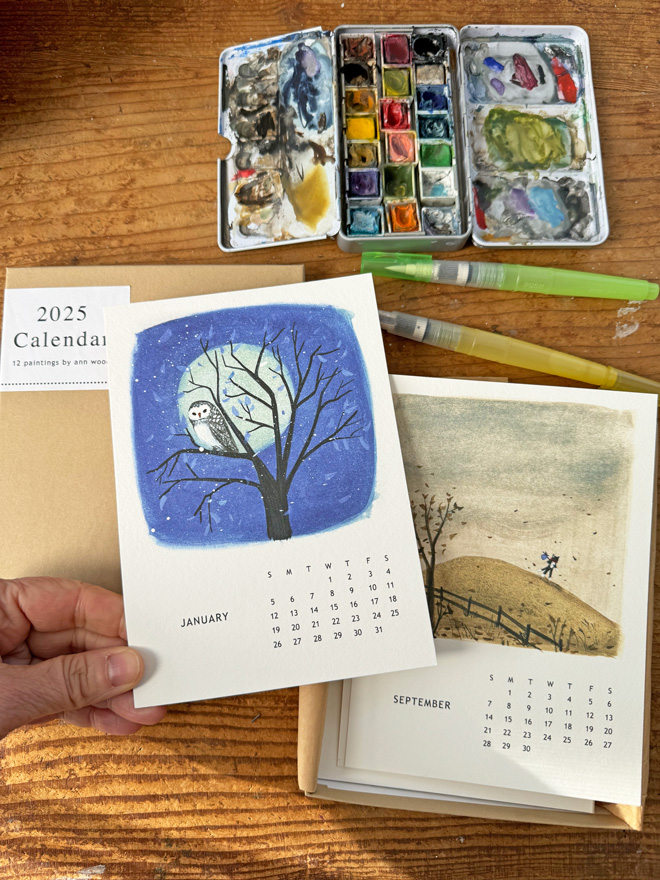
I’ve got a handful of favorite painting supplies curated over the past 5 + years of making a painting every single day. It’s super easy to travel with and it’s a huge help in the daily habit department that it’s simple and always ready to go.
paint box – I have a *couple of these. I love being able to curate my own colors. I was finding that I only used a few colors in the prefilled boxes. Plus having an extra white is super handy. This box has removable little pans I fill with watercolor from tubes. I use lots of different brands but *Koi is still my favorite watercolor.
Ignore the mess around me and focus on the majesty of my vintage french workman overalls. They turned up at the last flea market I visited in France this July. I’ve been on the hunt for them forever. The joy is real.
What’s bringing you Joy this September? Would you rock these overalls? Will you give the creative spark a try? Let us know in the comments and happy almost Fall!
Mini tetra pincushions. Made from little scraps of my most favorite fabrics and a couple inches of twill tape. A last minute project for the songbird workshops in France with French General. They are quick and easy and could also be filled with lavender or lemon verbena. They’re made from one rectangle of fabric – twice as long as wide. For these little guys it’s 2 inches by 4 inches.
This flock was made by the first group in France last week – so much birdness!
It’s all green lights for the French Circus. Sometimes the universe seems on board for an idea. I keep bumping into gorgeous antique and vintage supplies for costuming the circus folk. And I’m finding treasures and inspiration for the top secret “mysterious box” project at Squam this September.
The good luck started before I left. I bumped into a huge collection of vintage millenary supplies at a guilford tag/estate sale. Tons of mini tassels! And a big stack of cotton velvet.
My first stop in France delivered antique trim and gorgeous brocades – I see caps for dancing elephants, ragged jackets for monkeys and lions and tutus and bicornes for cat acrobats. And look at that pompom trim! I can’t wait to start experimenting with them.
What’s on your worktable this July? Do you need a mini pincushion? Are you reading anything great- I brought Pachinko to France with me – so good.
This little doll cloak is made with just one seam and one piece of felt. Magic – it’s almost too easy. Details are optional and there are so many possibilities… Little folks will be delighted by the process and the transformation of this flat shape into a sweet hooded cloak just right for the tiny rag doll.
doll cloak materials
the template
felt -quality matters- wool or wool blend is best
embroidery thread
embroidery needle
small button or bead
That’s it! That’s all you need. The cloak is assembled with just one little seam and the rest is decorative. You can use any edge stitch and add as much embroidery detail as you like. Find lot’s of edge stitch tutorials here. My first cloak is super simple. Its sweetness surprised me. The result is so delightful I feel like it should have been harder to do. And it’s just so spot on right for the tiny rag doll.
Cut out the template and use a sharp pencil to poke holes at the ends of the two lines. Pin the pattern to the felt and use a colored pencil or disappearing marker to mark dots at the ends of the lines. Cut out around the template.
Remove the pattern and draw the two lines- connecting the dots.
Cut the lines – sharp embroidery scissors or thread snips make this easy.
Using matching or contrasting embroidery thread (I’m using 2 strands of embroidery thread) insert your needle close to the edge at the center of the V shape. I used a tiny knot at the end of the thread and I’ll clip the tail super short.
*the commercial break
Support the always growing free pattern library.
Why is it important to support free patterns? Because they attract a lot of attention. Web hosting has become massively expensive and the free patterns page here drives that cost. It’s a conundrum…
Fold the felt in half and make one little stitch and knot it. Stitch the seam to the point using whatever stitch you like. I’m using a simple whip stitch.
The outside of the cardboard house has been on my to do list forever. Two things got me moving:
I happened upon this house. I love everything about it. I’m not going full on folk art but a little color and graphic detail will be just right.
And I made some space. The actual, available work space on my table has been getting smaller and smaller as all the things in progress and essential items encroach. Spending an hour getting organized and reclaiming most of that space made a huge difference. It’s restorative and refreshing and motivating. A chunk of dedicated time and space for a project is magic.
doll house shingles
The bulk of the work, before the fun stuff (finish painting and maybe some window boxes) is the chimney and shingles. The chimney is done with the egg carton stone technique.
I also used some spackle to add a little texture to the walls and cover some of the tape edges.
After way too much thought I went with a kind of haphazard fairy cottage shingle situation for the roof. The cardboard is a thin corrugated- pretty stiff -but easy to cut with scissors. The shingle size varies – but mostly around 1 by 1.5 inches. They are glued on in rows with a generous amount of wood glue.
I’ll finish shingling the roof this weekend, sand the chimney and then everything is ready for paint. It’s all going much faster than expected. I’ll be a little sad when it’s done. I’m a process person. Stay tuned for paint details soon.
the captain charmley sideburn verdict
Sideburns were the clear winner. But no sideburns made a respectable showing. So I think I will include an extra template and the option to skip them in the pattern.
Thanks so much for your input – it was super helpful.
the bunny situation
A pair of bunnies have been eating my flowers. And parsley. And the tops of my leeks. A couple days ago I saw them siestaing in the shade. I’ve named them Snakkin and Nappin. They were so peaceful and happy and I watched them from the window for a long time. At one point Snakkin was lounging on his back, feet in the air and he reached for the parsley and pulled it down to his mouth for a little bite. Pretty luxurious. I went down and a confrontation ensued. You can see it here. Apparently I’m terrifying because they have not been back.
I’m super into tiny, miss thistle size flowers this year – forget me knots, oakleaf and pinkberry among them. The bunnies do not seem to care for those. So far. I’ve been making mini ceramic vases to hold them. I also planted some wild flowers for mid summer surprises and, for the first time, “Love In the Mist” Miss Jeklly variety. Hoping to dry them- the seed pods are glorious.
and a flea market report
The first treasure: tiny puppet/dolls. They are actually a friend’s estate sale find but I had to borrow them and show you. The costumes and expressions are everything. They are giving me all sorts of ideas for new tiny doll wardrobe items.
Also in the tiny people department this little man who sits and stands looking eternally guilty about something… Also outstanding in features and costume.
And finally this needlepoint dog portrait. I love it and plan on framing it so the moths don’t’ get it.
Are you making a cardboard house? Any great flea market treasures? Do you have a bunny situation?! Let us know in the comments,
Join me in Los Angeles this October! You can participate in any or all of the workshops – a significant discount applies if you take all three. All materials supplied!
In a few weeks I’m headed to France and I’ll be shopping with the french circus and stitched vessels workshops on my mind. I love treasure hunting with something percolating in the background- it makes me notice things I might not. The context shines a bright light on stuff that might be missed in the great sea of intriguing things. I want color and stripes and little bells and buttons and trim. Those one of a kind details add so much. I’m super excited to share all that in the workshop and see lots of woebegone french circus folk come to life.
An evening of conversation and slow stitching. Learn to layer and stitch fabric scraps to form a small vessel. This is an improvisational and meditative process. The technique is simple, flexible and easy to do.
All materials and refreshments provided.
Saturday – The French Circus – Elephant And Cat
10am-5pm
Coffee, lunch and aperos
$300
Join Ann Wood for a day (or two) of stitching and imagination with the french circus as our inspiration.
Saturday”s workshop includes the elephant and cat and all wardrobe pieces. You will receive patterns and instructions for both dolls and our goal will be to complete 1 dressed figure in our day together. Overachievers might complete both.
We’ll be working with antique and vintage textiles, French General prints and solids, my favorite wool stuffing and treasures collected in France: lace, buttons, notions – magic little details to add to your one of a kind piece.
Basic sewing skills are needed, we will be stitching by hand and machine.
All materials will be supplied.
Optional – if there is a fabric you would love to work with feel free to bring it. It’s also helpful to have a disappearing fabric marker.
Sunday – The French Circus – Lion And Monkey
10am-5pm
Coffee, lunch and aperos
$300
Sunday’s workshop includes the lion and monkey and all wardrobe pieces. You will receive patterns and instructions for both dolls and our goal will be to complete 1 dressed figure in our day together. Overachievers might complete both.
We’ll be working with antique and vintage textiles, French General prints and solids, my favorite wool stuffing and treasures collected in France: lace, buttons, notions – magic little details to add to your one of a kind piece.
Basic sewing skills are needed, we will be stitching by hand and machine.
All materials will be supplied.
Optional – if there is a fabric you would love to work with feel free to bring it. It’s also helpful to have a disappearing fabric marker.
We use cookies on our website to give you the most relevant experience by remembering your preferences and repeat visits. By clicking “Accept”, you consent to the use of all the cookies.
This website uses cookies to improve your experience while you navigate through the website. Out of these, the cookies that are categorized as necessary are stored on your browser as they are essential for the working of basic functionalities of the website. We also use third-party cookies that help us analyze and understand how you use this website. These cookies will be stored in your browser only with your consent. You also have the option to opt-out of these cookies. But opting out of some of these cookies may affect your browsing experience.
Necessary cookies are absolutely essential for the website to function properly. This category only includes cookies that ensures basic functionalities and security features of the website. These cookies do not store any personal information.
Any cookies that may not be particularly necessary for the website to function and is used specifically to collect user personal data via analytics, ads, other embedded contents are termed as non-necessary cookies. It is mandatory to procure user consent prior to running these cookies on your website.


 (click the image for a larger view)


