Category: how to

french hens

handmade hens

handmade blue hen

Suddenly a chicken appeared! Or more specifically  a hen, a french hen. It occurred to me that maybe the merry wobbler sewing pattern could be modified to make a hen – and it can!  Of course they need nesting boxes too and I created a little template and tutorial on how to make the box and modify the wobbler. Both are super simple – find the template and instructions below after lots of hen pictures –  I couldn’t help it  – I love them.

handmade hens

handmade french hens

hen house

blue and white hen

french hen posteriors

You can download the template for the nest box and hen parts here.  

bird sewing pattern


And you will also need the merry wobbler sewing pattern or, if you like, come up with your own bird to chickenize.

Other supplies are:  felt for hen parts and the nest, a glue stick, cardboard  and embroidery thread- I’m using dmc 8.

nest box 1

Beginning with the nest box – cut out 2 of the felt shapes for the nest and one cardboard bottom – cereal box weight cardboard.  Read More

houses for mouses

mouse house party

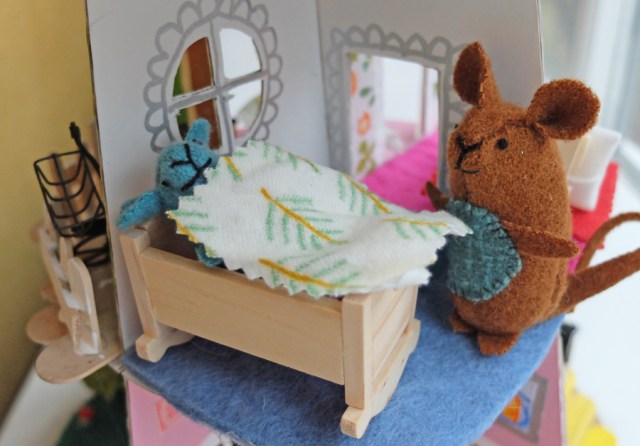
So many nice mice! I love seeing what you make.  Check out the fantastic mouses and houses!! by readers below – I love them – every little detail.   This multi level affair is by Maura for her son – I can’t stop looking at it.

mousehouse_maura

mouse house

mousehouse_maura_2

mouse house

mousehouse_maura_3

And A little house in a box by Mama with a Needle and Thread for her little girl – so freakin sweet. Good night little mouse!

mouse house

mama_baby_mouse

Susan added little wooden bases to her dinner place card mice – it’s such a happy crew.

place card mice

happy mice crew

They survived a perilous journey across the couch – stay in a group little mice, stay in a group!

perilous mouse journey

And finally from Larissa – mmmcrafts –  slippers, mittens and snowballs  – I love it.

larissa holland mice

the somewhat weekly newsletter


Do you get my free weekly-ish newsletter? There are tips and tricks, ideas, stuff to try, all the latest news and blogposts and extra stuff, just for subscribers, delivered mostly on Friday. Pretty much.

very nice mice : pattern and instructions (and it’s free!)

very nice mice pattern

I’ve made you something! A free sewing pattern for some very nice mice. You can download the pattern here and all the instructions are below. So little – just 3 inches tall.  They are quick and very easy. And they love to go boating – they are the perfect size to captain my little felt boats.

very nice mice : sewing pattern

boating

support the ann wood handmade free pattern library with a happy donation

Support free patterns like very nice mice with a very nice donation. 

Click here to add your support.

little green mouse

nice mice supplies

pattern notes:

I designed this pattern specifically for hand sewing and felt.  The seam allowance of 1/8 inch is included.  I recommend  small, tight, straight stitches with cotton thread.

material list:

pdf pattern

felt ( wool or wool blend)

matching sewing thread ( I think cotton works best)

embroidery thread

stuffing ( I like wool)

pencil or disappearing fabric marker and – optionally – pink colored pencil

sewing and embroidery needles ( a sturdy sewing needle is helpful for sewing through multiple layers of felt)

pins

chopstick for turning and stuffing

mice_1_2

1. Cut one back and two side pieces from felt.

2. Mark both side pattern pieces with the guide dots on the pattern.

mice_3_4

3. Cut out the small pieces – I used a lighter scrap of felt for the tummy oval (textured wool or cotton is nice too).

4.  Stitch the side pieces together from the tip of the nose to the bottom guide mark –  your stitches should be an 1/8th of an inch from the edge of the felt.

mice_5_6

5. Optional – use a colored pencil to add a little pink to the ears.

6. Open the side pieces you sewed together.

mice_7_8

7. Place the top of the back piece (the narrow end) in the center, matching the top edges. Insert the needle 1/8th of an inch from the top coming out  on one side of the center seam (the side you intend to sew first). Make one tiny stitch and knot tightly.

8.  Turn the back piece to one side and begin to match the edges and sew the seam-following the curve and  maintaining an even 1/8 inch seam allowance.

mice_9_10

9.  Stop sewing and knot your thread just before the pattern guide dot on the side piece – leave there needle and thread attached.

10. Fold the bottom of an ear together – with the pink inside.

Read More

starting where you are

I think if you want to make progress, find your best work and ideas, you must be willing to start where you are – as awkward or small as that might be.  I’m usually very willing to do that – it’s one of my main life skills (the other is that I am insanely persistent, relentless even, the cool hand luke of art and craft).  As soon as I started to compile the patterns I’m working on I realized that video instruction would be helpful – there’s nothing like a demonstration and it helps with language barriers on tricky steps. I have no video making knowledge or equipment beyond my semi  broken iphone and a part of a tripod I found in the trash  but I put something together with stuff I had around that’s working well enough and I wanted to show you in case you’re in need of a similar solution.

video settup

I used a table lamp clamp I got at a yardsale,  a wood clothespin and 2 file clips.  The clips slide in and out of the clothespin easily and I can position it in a bunch of useful ways – it’s getting the job done.  I’m looking forward to getting better but having fun being a mess and experimenting. The whole pattern making experience has put me into that curious and driven kind of place that I was in when I began  7 years ago.

Today I was taking stills ( I don’t use the phone for that) and making videos for the next pattern – paper mache ships and boats (start saving your cereal boxes). I’m hoping to finish the photography tomorrow morning, test the rough draft this week, put it all together over the holiday weekend and have it available just after that.

ship mast

ship romance

paintbox 7/29

paint box 7/29

The ships and boats are a very satisfying project to make and I’m excited about sharing it.

Thanks so much to everybody who has purchased the bird pattern. I’m putting a post together of birds made by y’all and if you’d like to be included you can send a photo to me at: ann at ann wood handmade dot com  (please put bird photo in the subject).

how to make a perfect bird leg

I keep adding things to the bird pattern. Last week I decided it needs videos so last weekend I shot how to sew the body, ( it’s the trickiest part) you’ll get a link to that with the pattern download. And today I shot “how to make a perfect bird leg”.

mason

It’s one of the things I’m most often asked about, the little bird legs, so I thought I would share that now as a gift. It’s my first ever video! It should be below  – if not click here.

How to Make a Perfect Bird Leg

*measurements are approximate for a bigger foot use more wire and create a bigger loop

* and one correction – if you find the 18 gauge wire to difficult use a HIGHER gauge wire – I incorrectly said lower gauge

tools and materials list:

18 or 19 gauge steel wire (hillman is my favorite brand)
floral tape (flora is my favorite brand)
needle nose pliers
wire cutter
hammer
hard surface

I hope you make bird legs! And stay tuned for the little bird pattern – it’s almost there. If you’d like email updates about new patterns and workshops etc. you can subscribe here.  Be sure to check the “make something” box on the signup form.


paper mache teacup pattern

A paper mache teacup pattern to  mark the 5 year anniversary of my blog, my experiment.   A  perfect time to say thank you and give you a present.

There is a template you can download here.

And lots and lots of photos and instructions.  If you do make teacups I’d love to see and you can use #annwoodpattern on instagram or leave a link to your photo in the comment section below.

ann wood teacups

What you need:

  • Click here to download the template
  • paste –  I use golden harvest wheat paste ( wall paper paste)
  • light cardboard – cereal or frozen pizza box is great and a bit of thicker cardboard for a base
  • newspaper – it’s nice to have different colors
  • scotch tape ( not the invisible gift wrap  stuff- the shiny sticky stuff)
  • glue – elmers, glue stick, hot glue  – whatever you like
  • pencil, scissors, exacto knife, and paint and brushes, glitter, fabric – whatever you’d like for decoration.

Click the photos for larger images.

Cut out the templates for the teacup, handle and bottom  and trace them onto your cardboard. I had the best results with a Kashi frozen pizza box.  Cut out your pieces and  very lightly and  gently score the the teacup where the dotted lines are on the template with the BACK of your exacto knife.

Make a very  tiny snip  – really tiny -just a 16th of an inch or so where the sections meet. Next bring the bottom sections together one at a time and tape together on the outside (the printed side). Then turn it over and taper the bottom inside.  Do this for each section – always taping both sides…….

Read More

things to do on a rainy day

rainydayship

I made the ship above  as a prop for a TV commercial a couple years ago.  I assembled some boxes and parts of boxes into a shipish shape and then added all sorts of stuff – pipe cleaners, dixie cups, part of a birthday crown, wooden ice cream spoons, buttons, felt, etc. etc. The castle collage below was for an ad as well. I think they would be fun for little people to make ( with some grown up help).

castleflat

Both  involve using the die cut sections of boxes for details .  I can’t resist a good piece of cardboard – I live near a fancy grocery and their recycling is full cartons and boxes with  interesting cutouts and shapes.

cardboard

paper mache boat pattern

And instructions. Epic instructions.  They just go on and on.  I hope to add more concise printer friendly instructions later but my Christmas brain just isn’t capable of it. We are making  Mediterranean inspired little sail boats with lateen rigging – a single triangular sail on a relatively short mast.

**download pattern here**

What you will need:

large cereal box
scissors
scotch tape
ruler
exacto knife
newspaper- 2 colors
wall paper paste
paint brushes
paint
skewers. dowels or twigs
string
heavy duty thread
needles – various sizes
fabric
buttons
glue


(click thumbnails for larger images)

Download the pattern here and cut it out on the dotted line – the solid lines are for scoring –  there are little triangles on one end  – you can fold those back to trace the line onto your cardboard and poke your pencil through the tip of the V on the pattern to mark your cardboard.

Use a ruler to draw the lines as shown on the pattern. I’ve highlighted the lines to score in red. Use the BACK of your exacto knife to score the lines in red and then gently bend the boat into shape…… Read More

new boats and castle press

fishingboats

The fleet here  is growing rapidly. I’m working on all sorts of new boats and ships and the little lateen rigged sailboats inspired by van gogh’s fishing boats are for you to make, I’m going to share the pattern and instructions next week. It takes me forever to work out the “how to” stuff but I think it’s pretty much there and I just need to test it on a couple people and photograph the steps. They are simple and relatively quick, I think you’re going to have fun making them.

Cardboard castle news:

Cardbaord Castle #2 is in the current issue of Elle Decor  – Japanese edition.  I get excited about any celebration of cardboard castle making and the entire magazine is lovely  so I’m pleased and flattered to be included.

cardboardcastle5

tiny tophat

How to make a tiny tophat (in excruciating detail).

What you will need: top hat pattern (click to download pdf), black poster board, scissors, manicure scissors ( for trimming the little curved bits),  elmer’s glue, floral tape, large paper clips, a light color pencil, a dowel or something for  curling the poster board  and black glitter.

tophatmaterials

Trace the 3 pattern pieces onto the black poster board and cut them out. I use a large paintbrush handle to curl all the pieces a little as shown below. I feel this step is key to your success as a tiny tophat maker. Next, overlap the edges of the cylinder about a 1/4″, glue, and clamp with a paperclip.

tophat1      tophat2     tophat3

When the cylinder is dry trim off any extra bits you might have so the bottom and top edges are pretty smooth, apply glue liberally to the top and bottom edges and place the brim and top.  I use floral tape to hold it all together while it dries.

tophat4       tophat5      tophat6

When the glue has dried trim off any excess on the top and brim and shape and smooth the brim with your fingers. Use the exacto knife to poke a hole in the bottom and then insert the little scissors to cut the opening.

tophat7      tophat8      tophat9

Paint it quickly and completely with elmer’s glue, give it a roll or shake in the glitter, leave it to dry and brush off the excess glitter with a stiff paint brush or old toothbrush. Finished!

tophatthumb

Hello tiny tophat!