They get better with age and use. All sorts of important treasures are stuffed in here. The original ribbon closure blew out a while ago as the girth increased and was replaced with a red string that wraps around. I love the red string, a happy accident.

I’m working on some smaller needle books, just one or two pages, really just for needles. There were a bunch of little stitch experiments (I think the original idea was amulets) hiding in the above over stuffed book that are being incorporated into the covers. A couple are for gifts and there will be a few in the shop too (post holiday I think).

Little pin dishes will be available in January too. They are glazed and waiting to be fired right now.
and little dolls

The hairstyle on this tiny lady is a little different than the style in the pattern – it’s super easy.
1. Add about a quarter inch to the length of the hair fabric. Other than that follow the pattern instructions until the hair is attached. Tuck in the edges of the end and gather.
2. Twist the fabric.
3. Wrap around the head, pin and whip stitch with tiny stitches to tack it to the head. So sweet.


It’s been ages since I worked on tiny dolls and wardrobes but now I’m on a roll. I’ll show you more next week-ish.
not a creature was stirring…


Except this guy.
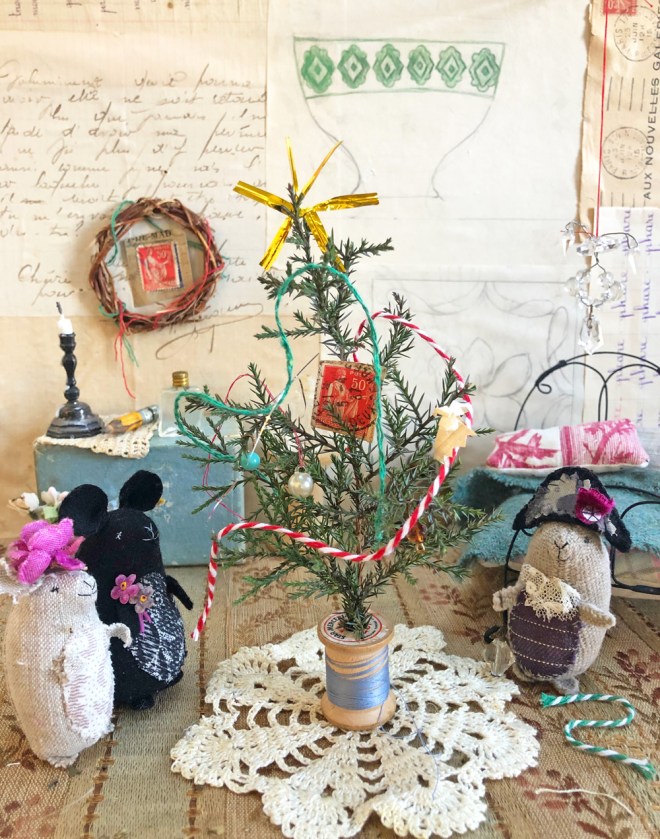
A brand new card made from a daily painting. Also note in the background the beginnings of a Christmas tree. The Norfolk pine has been on Christmas tree duty since 2014. It was my first tree as an adult. Some years it’s fancy and some years it’s simple. I’m still on the fence about this year. So far it just has a little tinsel. It takes me around ten minutes to place a single strand of tinsel. I’m one of those people… Next week I’ll get serious about decorating and wrapping and will of course report all developments to you here.
Are you decorating? Have you made ornaments or garlands or cookies? Are you sewing gifts? How long does it take you to place a strand of tinsel? Let us know in the comments.