Tag: sewing pattern

doll house bed tutorial – part 2 : making the mattress

doll mattress sewing tutorial

free doll mattress tutorial

This tufted doll mattress and pillow fit the clothespin dollhouse bed perfectly. It’s quick and easy to make and perfect for the tiny rag doll.

how to make a tufted doll mattress

You will need:

doll mattress sewing tutorial

1

1. Cut out the mattress from cotton fabric, pin with right sides together and stitch as shown.

2.  Pull the fabric sides apart at the corners

3. Open the seam allowance with your fingers and press the seams together. Stitch across at 1/4 inch. Do this for all 4 corners.

doll mattress sewing tutorial

4

4. With all four corners sewn the mattress should look like this.

Read More

little doll pants : a free sewing pattern

doll pants hand sewing project

The little pants are very, very easy and quick and could be resized to fit all sorts of dolls. It’s a fun hand sewing project or if you like you can sew them on the machine.  In case you want to make one million pairs of tiny pants.

doll clothes diy - pants

He looks so happy! Happy to be getting pants. Little pants, just for him. It’s time to make the lambs and get pants on them. I’ve made you a simple pattern for little pants. The lamb is made from the mr. socks sewing pattern with these modifications. Mr. socks could wear pants too if he felt like it (you know how cats are…) but you would need to leave an opening in the back seam to accommodate his tail.

doll pants sewing pattern

free doll pants sewing pattern

doll pants sewing pattern

Click here to download the template.

You will also need – cotton, a basic hand sewing kit, embroidery thread and needle and a little button.

doll pants diy

Cut 2 pants pieces, cut the top and bottom edges with pinking shears. Mark the seam lines lightly on one piece, pin right sides together and sew just the curved seams.

doll pants tutorial

Open the pants so the curved seams you just sewed are in the center. Pin the legs together and sew the straight leg seams.Trim the leg seam allowance with pinking shears.

doll clothes sewing tutorial

Fold the top edge over about 1/4 inch (try the pants on your doll for a perfect fit). Stitch the folded over top with small neat stitches. Fold up the leg bottoms and hem.

doll pants sewing tutorial

Add a draw string of embroidery thread – stitch through the top folded edge – leave the ends hanging. Add a button in the center. Pull the strings to gather and wind around the button clockwise to hold. You’ve got little pants!

doll clothes hand sewing project

Wearing pants and feeling good about it.

lamb in pants

Add the free felt jacket and free felt hat patterns (larger sizes for both) and you have a fully outfitted lamb!

Do you get my free weekly-ish newsletter? When you subscribe you can download the deluxe pants template with instructions.

floating ship in the pines, frida, a blue girl: lovely things made by customers

lovely things made from ann wood handmade patterns by customers

 I love seeing what you make with ann wood patterns, the details you invent, the stories you create and share. 

made from ann wood patterns

This enchanted paper mache ship is by Tierney Barden. I love it, the image makes me think of Narnia. And More gorgeous ships by  floratwigg and Sharon.


The bed and blue doll are by Melanie. She is creating a whole  world for that mysterious blue tiny doll.

From Melanie: “making this, I thought my heart was going to explode!! “


I so get that feeling and I  love everything about this, the joy in creating it is unmistakable and beautiful.  I’m looking forward to more of that blue doll’s tiny world. Also be sure to checkout her needle book, the brilliance of it can not be contained in a photo – the little book is filled with ideas, imagination and inspiration. Check out this video.

Find the tiny doll pattern here, and the hearth tutorial here.

Darling miniature china made by Carolyn using this paper clay  tutorial.

made with ann wood doll pattern with modifications

Bunnies and laundry!! Created by Rachel. The bodies and clothes are the tiny rag doll pattern and the bunny heads are her own.

And tiny rag doll has had a baby!! The dolls below are also by Rachel.  She used the doll and wardrobe patterns as well as the tiny hat tutorial. That baby is all her. Such beautiful work.

And more dolls with sweet details added – a little lady by @onbaycreek and a birdwatching boy by annette.

mushroom sewing pattern

Perfect little toadstools by Randeen  and Stella and Summer – made from the little mushroom pattern.

owl dewing pattern

Dastardly owls by Erin, Wendy and Joyce.

bird sewing pattern

Gorgeous birds by Suzanne and Yvonne and Deb.

Super sweet and pink! wooly squirrel by Beth  (forest folk pattern).

Hello little pirate! These are all made from the free very nice mice pattern the pirate is by Beth, the little gray mouse is by Bushra and the bunnies are made by Elizabeth – she added the long ears and fluffy tails to the mouse body.

There were so many photos of wonderful creatures and dolls it was overwhelming and difficult to choose. Please checkout  #annwoodhandmade  and  #annwoodpattern  on instagram for more sweet creatures and dolls and marvelous ideas and imaginative details added by the makers.

the world’s sweetest needle book : a free sewing pattern

heart needle book sewing pattern

free heart needle book tutorial

This little book will certainly hold your needles. It could also be a repository for the scraps you can’t part with. It could tell a story, mark an occasion, like a birth or anniversary, or be a sort of travel journal, the pages filled with little things found along the way and saved.

needle book and tiny rag doll night gown

I always travel with small sewing and it is always a mess of ziplock bags and other aesthetically unappealing containers with sharp things poking out of them. This started as a practical project and turned into a whole other thing.

I made this needle book for future me. Future me is the sort of person who is packed a week before travel, has extra light bulbs and never runs out of toilet paper.

needle book made from scraps

needle book ideas

I’m in love with my little needle book and plan to take it pretty much everywhere for the rest of my life. There are more of these books in my future, for needles and ideas and memories. It is good winter evening sewing.

needle book : free sewing pattern

pin it for later

I’ve put together a tutorial for you below. And subscribers will have a link to a pdf download emailed to them.

You will need a basic sewing kit and the templates.

download the templates

materials :

  • cotton or light linen 
  • scraps for details
  • matching and contrasting thread
  • button
  • embroidery thread
  • batting or felt
  • light weight cardboard
  • ribbon
  • gluestick

patch and appliques : needle book pages

Cut out two each of the A, B, C and heart pattern pieces. One side of A will be your cover page. Add patches, embroidery, appliqués, and other details to your pages. Also cut out 2 cardboard support pieces from light weight cardboard ( a cereal box is great). Use a glue stick to glue the cardboard to pieces of batting or felt and cut out.

Note: Piecing fabric together before cutting the pattern shapes creates a nice variety in the pages.

needle book : ribbon latch

Cut a 3 and 1/2 inch length of ribbon or trim and fold in half. With the right side of the cover fabric facing you pin the folded ribbon to the center of the left side. The folded edge should extend 1 and 1/4 inches from the seam line.  I’m using 1/4 inch cotton twill tape.

needle book_tutorial : seam lines

Pin The A, B, C and heart pieces with the right sides together and stitch the seam lines. Leave a small section on each open for turning. Be sure that the opening on A is large enough to insert the cardboard supports. Clip off the corners of the rectangles close to the seam. Clip the bottom point of the heart and clip notches around the curves at the top and at the center.

needle book tutorial : stitch pages

Turn your sewn and clipped pieces right side out. Use a chopstick or similar to push the corners and curves all the way out.  Add any additional appliqué or other details.

needle book tutorial : insert support

Insert the cardboard and batting pieces into the cover page. The batting side should be facing the inside and the cardboard facing the outside cover.  Push the cardboard all the way to each side, there should be an empty space between them. Leave the cover open at the bottom.

Read More

the dastardly owl sewing pattern is in the shop

a sewing pattern for a dastardly owl

a sewing pattern for a dastardly owl

Make this owl. This imperious and condescending owl. He measures 9 inches tall  from disgruntled talon to sinister horn. And the pattern scales well if you would like to try a larger owl.

The PDF pattern download is 31 pages long and has more than 130 color photos.  You’ll learn how to construct the basic body shape and talons as well as my system for creating owl-ish layers of feathers and a dastardly expression. Every element is broken down into steps and fully explained.

page form the ann wood handmade owl pattern

a gray soft sculpture owl

owl sewing pattern back feathers

owl sewing pattern : stuffing the legs

The pattern has all the top secret tricks I’ve come up with over 12 years of making ill tempered owls. And I’ll share this one with you here:

When the layers are fully assembled spritz with water or spray starch if you like.

smoothing owl feathers

And run a hot iron over the feathers. I do it to his face too (so rude) to adjust his dastardly expression. It has a magic effect, un-ruffling the feathers and giving the layers extra owly-ness.

I’m so excited to share this pattern with you! I’m so glad it’s done! I can’t believe how much work it was!And I hope you make owls!


owl sewing pattern - wool scrap owl

the somewhat weekly newsletter

Do you get my free weekly-ish newsletter? There are tips and tricks, ideas, stuff to try, all the latest news and blogposts and extra stuff, just for subscribers, delivered mostly on Friday. Pretty much.


printing fabric with bleach for stitched mushrooms

The quest for the perfect organic dot fabric for toadstools is never ending, I’m always on the look out for fungal feeling dots, speckles and marks in general and I’m super particular. Shopping in LA a few weeks ago there was lots of nice batik stuff that was close but no cigar. I described my dream fabric to my friend Molly and she said “dude you could totally make that”. That is such a good attitude. Yesterday I experimented a little. And dude, I can totally make that, so can you.

making marks on cotton fabric with bleach

Gather some cotton fabric, bleach, wax paper and tools for mark making. I tried all sorts of things, rubber stamps, pallet knives, brushes, straws, cardboard, spools, on and on. Also put on an apron and some gloves and do this somewhere very well ventilated or outside.

marking with bleach on fabric using a pencil eraser

I had one little dish of straight up bleach (you just need a little) and another diluted about 2 parts bleach to one part water. I put wax paper under the fabric and started making marks. My favorite tools ended up being a pencil eraser, putty knife, a stiff bristle brush, a toothbrush for splattering and a little spool that I glued a piece of wool felt to one end of. A cork would have been good too – just thought of it.

spool with wool felt glued to one end for bleach printing

cotton fabrics printed with bleach for making fabric toadstools

The marks take a moment to begin to “develop”. I let most of the fabric sit for about 20 minutes before rinsing. I have googled/pinterested around and there are all sorts of interesting things you can do with this technique and you can get pretty fancy about it. Find a great tutorial here and another here. 

toadstools made from fabric

toadstools made from fabric, brown and red with spots

little mushroom sewing pattern


find the mushroom sewing pattern here

I love how they turned out, the bleach prints are so perfect for little fungi and there are endless things you could experiment with to make marks.


the somewhat weekly newsletter

Do you get my free weekly-ish newsletter? There are tips and tricks, ideas, stuff to try, all the latest news and blogposts and extra stuff, just for subscribers, delivered mostly on Friday. Pretty much.


it’s time to make the squirrels, stitching expressive creature eyes and wool stuffing in the shop

little hand stitched squirrel

little stuffed squirrels and whale ornaments on my work table

It is time to make all the little things, the little gift and ornament things. It is officially time. For those of you less procrastinatey than me it is way past time, I know you are out there, you organized types who start in June. Maybe I’ll turn over a new leaf this year, I would love to be done making my Christmas stuff by Thanksgiving.

little hand stitched squirrel

little stuffed wool squirrel

forest folk sewing pattern


Today I’m making very little squirrels, and thoughtful whales. This squirrel is just the right size for somebody’s pocket. He looks very happy in there.

get the forest folk pattern

stuffed wool squirrel in my pocket

He is a relentlessly happy little fellow.

whale ornament eye

For most of my small creatures I make the eyes the same way, a disorganized little cluster of stitches (you can see how I hide my knots here). On wool I use embroidery thread so it shows but on cotton I like the subtlety of sewing thread. And I find the less I think about the placement of the stitches the better, the more expressive the eyes turn out. This little whale has things on his mind.

squirrels and whales on my work table

adjusting stuffing placeement with a large needle

I stuff all the little folks and creatures with the loveliest wool stuffing. I spend a lot of time stuffing things, getting it just right and almost always fine tune the shape from the outside with a big needle.

Have you tried wool stuffing? it is all I use and I’ve added it to the shop in 4 ounce packs – that’s enough wool for lots of little creatures.

Are you sewing for the holidays? What’s on your worktable?

the somewhat weekly newsletter

Do you get my free weekly-ish newsletter? There are tips and tricks, ideas, stuff to try, all the latest news and blogposts and extra stuff, just for subscribers, delivered mostly on Friday. Pretty much.


the songbird pattern booklet

bird pattern booklet and wool stuffing

bird sewing pattern booklet
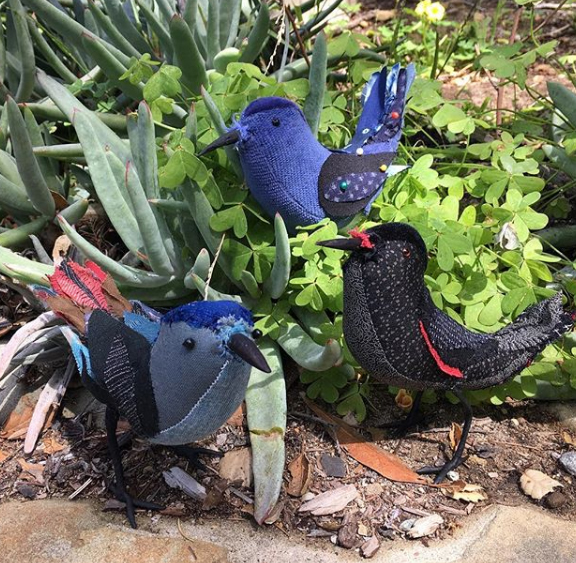
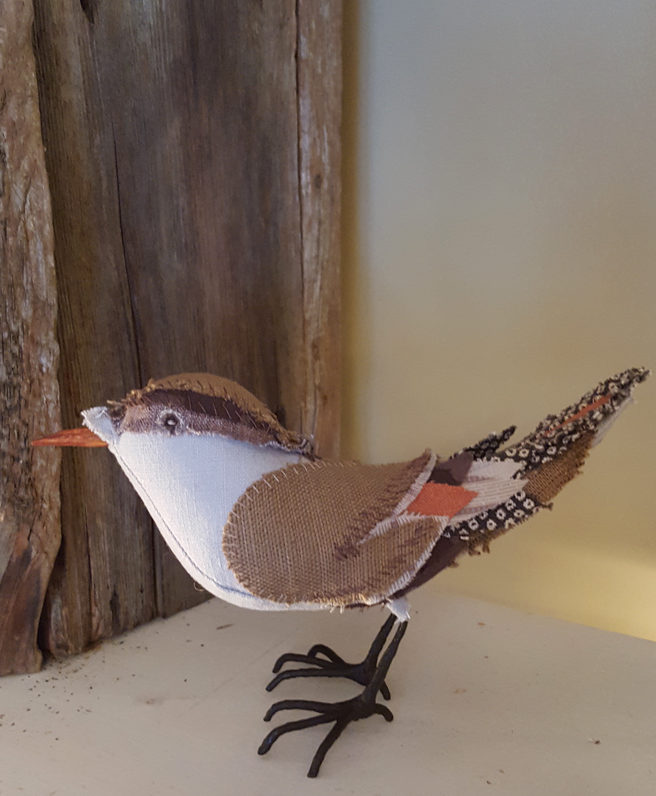
songbird booklets are back in stock now

I need deadlines. For everything. Even stuff I love doing.

I knew that before but I thought of it as a shortcoming. A bad thing about me I need to change instead of acknowledging how I’m wired and working with that reality. Figure out what I need, identify what motivates me and arrange my life as optimally as possible to support that. Just like time, focus, energy and attention motivation needs to be managed.

There is nothing like a credible threat to get you moving.  The songbird booklet lingered in almost done for ages. The unmovable, fixed date of the Squam Art Fair was the perfect motivation to push the print pattern across the finish line. Get up a little earlier, work a little later, beg the printer (local and awesome). Make it happen. It was painful. And I’m so glad I did it.

bird pattern booklet and wool stuffing

I love the booklet, and I love that it is done. It is more than 20 pages and illustrated with over 100 black and white photos. Checkout some lovely birds made from the pattern below and if you like you can send images to me at info at ann wood handmade dot com or use #annwodpattern on instagram.

P S- By the way I’m thinking of offering wool stuffing in the shop this fall – what do you think?

amulets and toadstools on my work table

fabric amulets and mushrooms on my work table

fabric amulets and mushrooms on my work table

Labor Day Weekend, the unofficial start of the holiday season. Just kidding.  Mostly. It does have a shifting feel to it though, everything starting back up again.  It’s going to be a sewing weekend for me. Fun sewing, amulets and mushrooms and Monday devoted entirely to experimenting. I’ll give you the full report on that next week.

fabric amulets and mushrooms on my work table

I’m still having  a good time making amulets, small thoughts, and they are generating all sorts of color and composition ideas for larger or more involved things.  They have become morning work for me, hand sewing with coffee before I’m quite awake yet. I love having a little stack ready to go and waiting for me.

fabric amulets on my work table

Do you pick up handwork first thing? What are you making? Can you give yourself a day or an hour or 20 minutes to play and experiment this weekend?

These are the things I want to know.

the songbird pattern is in the shop and a free tutorial : how to make a realistic bird foot

sewing pattern for a textile songbird

The songbird PDF pattern is in the shop.

Get the PDF digital pattern here and the booklet version here.

It has more than 100 color photos and detailed instructions.  You need basic sewing skills and some patience if you are a beginner.

stitched songbird in a tree

textile songbird in prospect park

hand stitched songbird - back

And to celebrate the instructions for making a realistic bird leg are below. I hope you make songbirds!

How to make a realistic bird leg with wire:

You can use any gauge wire you like, I think that 19 gauge soft annealed wire is the easiest to work with and provides enough stability for the legs. You can build up the thickness of the legs and feet by adding additional layers of floral tape.

how to make a realistic bird leg - step 1

1. Gather the wire, floral tape, hammer, pliers and cutters, ruler and a surface to hammer on, I’m using a little anvil but any very hard surface will do.
Cut 2 –  12 inch lengths of wire.

how to make a bird leg - step 2     how to make a realistic bird leg - step 3    2. Hold the wire with the pliers 1 and 1/2 inches from one end.
3. Bend the wire forming a loop.

how to make a realistic bird leg - step 4     how to make a realistic bird leg - step 5
4. Hold the loop just past where the wire crosses with the pliers. Bend the long end of the wire so it is perpendicular to the loop.
5. Wrap the long end of the wire around the short end behind the loop. Wrap as tightly as you can, keeping you fingers very close to the wrapping.

how to make a realistic bird leg - step 6     how to make a realistic bird leg - step 6
6. Place the wire on a hard surface and tap firmly with the hammer to flatten the wire wrapping. This will help the wrap hold in the next step.
7. Use wire cutters to snip the loop in the middle.

Read More

little doll jacket : a free sewing tutorial

tiny rag doll jacket

Sometimes a light jacket is just the thing and I’ve made you a simple and easy sewing pattern in two sizes, one for the tiny rag doll (or any dollhouse size doll) and a slightly larger version for mr. socks. And the pattern scales well so you could use it for other dolls too. It’s quick and very easy.

little doll jacket sewing pattern

tiny rag doll jacket

The hat pattern is free too and you can find the satchel pattern here, if you need to fully outfit someone tiny.

mr. socks jacket : free pattern

You might also notice that mr. socks is wearing pants for the first time. I made them using the bloomer pattern for the tiny rag doll sewing pattern. I add about 1/4 inch to the pattern and left an opening in the back to accommodate his tail.

mr. socks

mr. socks in pants
little doll jacket : free tutorial

little doll jacket : free tutorial

To make the jacket you will need : wool felt, an embroidery thread, a tiny button, basic sewing supplies and the pattern.

download the sewing pattern here

* You can click each image for a larger view

1. Cut out the three pattern pieces and pin to your felt.
2. Cut out one of each.

3. Fold the rounded collar of the front top over and stitch.  I’m using one strand of embroidery floss. You can use any stitch you like, fancy or simple. I’m using a basic whip stitch.
4. Fold over each rounded cuff and stitch as well.

5. Pin the front under piece to the back piece, make sure your folded and stitched cuffs  are on the outside.
6. Pin the front top piece as shown.

Read More