Category: dioramas

new tutorial : make a mini foot stool

There’s a lot to talk about in  the tiny rag doll’s world including the roaring fires upstairs and down in the cardboard house. Pretty luxurious. Jump down to the end of the post for more on that. Let’s start with how to make the sweetest, tiniest, heirloomiest footstool ever.

A note on the house – there is no pattern but you’ll find the measurements and tips for building below.

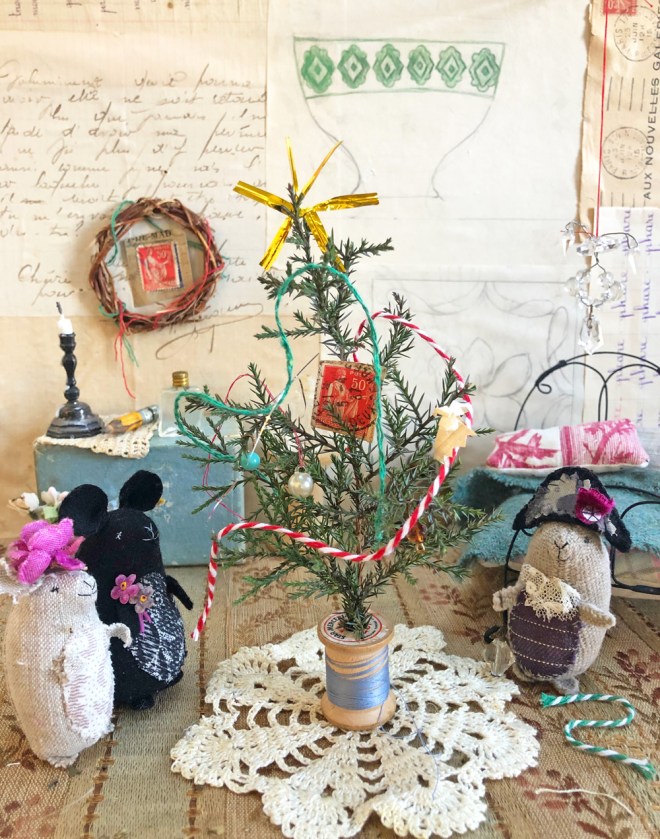
a sneak peek at miss thistle’s house and tips for building with cardboard

The footstool is super quick and easy. You can make it plain or do some faux needlepoint. I can’t stop making them and have all sorts of plans for the imagery.

Let’s make it – it helps to read through the directions before your start.

download the template

  • the template – download above
  • felt – wool is best
  • embroidery thread
  • glue – i love -ALEENES CLEAR GEL TACKY
  • cardboard
  • stuffing
  • small wood beads
  • craft paint and brushes
  • a basic sewing kit

make a dollhouse foot stool

1.  Pin the template to felt and cut out.  Trace the rectangle onto cardboard and cut 2. Round the corners of your cardboard rectangles.

2.  Optional – embroider the center of the felt  – I made some super simple flowers and leaves.

3.  We are going to fold the felt at this notch.

4. Match up the edges and whip stitch them together (whip stitch means stitch over the edge). Use small tight stitches. Stitch the notch and then continue along the side – stop about 1/2 inch from the point – shown in yellow above. Repeat this at the the three notches.


tiny rag doll sewing pattern

Get the tiny rag doll sewing pattern

She’s just 5 inches tall and fits in the palm of your hand. Perfect for a doll house or somebody’s pocket. And she has a tiny wardrobe: dress, reversible pinafore apron, bloomers and camisole – all included in the pattern.


5. With all four sides stitched your piece should look like this.

6. Turn it right side out – use a chopstick or similar to gently push the corners all the way out.

7. Add a little stuffing.

8. Optional – add a penny- the little bit of weight gives it stability.

9. Insert one of your cardboard pieces.

10. Stitch the edges of  triangle flaps together to close the back.

the finished back and front


11. Paint your wood beads and the edges and one side of your cardboard.

12.  Apply glue to the entire surface of the unpainted cardboard.

13. Glue the cardboard to the back. Press it firmly and place something on top while it dries.

14. Add a drop of glue in each corner and place the beads. Let them dry completely.

Finished! It’s so dear.

make a miniature fire

flames cut from coffee filters and painted orange and yellow - cardboard wood stove in background

The fires are mini led string lights and painted coffee filters. The lights are fed up behind the fireplace and into the wood stove – it was awkward. Also – I cut 3 sides of the wood stove door to make it open and painted the inside black. I so wish I had a flameless flickering votive on hand. It’s on my list… The coffee filters are painted with watercolor in bright yellow and orange on both sides. After they dry, trim them to flamey points and bunch them up a little. Arrange them in front of the lights and you’ve got a miniature fire.

So cozy on a March morning to come home after your tiny chores to sit by the fire with your tiny feet up. Do you need a mini footstool and  roaring fire?! Let us know in the comments and happy spring!

exciting developments in tiny curtain hardware for the cardboard doll house

What’s more luxurious than a little wood stove in your bedroom on a cold spring morning? #lifegoals  There has been major work on the cardboard house for the tiny doll. Decisions have been made and actions have been taken.

doll house made from corrugated cardboard with diy furniture

miniature curtains

The big news is an exciting development in tiny curtain hardware, such a break through, let’s start with that. The original plan was to just tack up little bits of fabric and lace but the idea of hardware and removable rods would not leave me alone.

The twig solution is just right for a cardboard house and super easy to do. All you need are some twigs and hot glue. Snip off sections with a little limb and glue to the wall.

Stitch or tie on fabric or weave a little twig through the lace.

*this post contains an affiliate link highlighted and marked with an asterisk

bedroom walls and floor

The upstairs walls got one more coat of paint in warm white and a border with a carved rubber stamp. I made the downstairs and upstairs stamps with this easy block kit (*this is an affiliate link – meaning I get a small commission if you purchase through the link). It really is easy and I want to make lot’s more.

There is a closer look at the stamped downstairs walls here.

The bedroom floor needed to be super simple and playful in scale. The removable cardboard floor  is painted a reddish brown and simple planks were added with darker colored pencil.

wood stove and hearth pad

The wood stove for the bedroom needed a hearth. It’s a matte board (on the wall) and a half circle of foam core for the floor. The stones are made using this tutorial. The little stove (made with this DIY) also got a roaring fire. Cut the door on three sides with an xacto knife and bend it open. I painted the inside black and orange and yellow tissue paper was added.

It’s the coziest room ever. I want to live in it.

Checkout the miss thistle society for more tiny world tutorials. Are there twig curtain brackets in your future? Are you working on a world for somebody tiny? Let us know in the comments.

glamping with very nice mice

little handmade mice with a feed sack tent on a camping trip

little handmade mice with a feed sack tent on a camping trip

The admiral, mrs. croft and friends set out on a holiday camping adventure over the labor day weekend. They are, of course, glampers. The kind of mice who feel a chandelier, china, carpets and a proper bed are bare necessities. (PS – note on the photo – the fire is pretend- photoshopped in)

fabric mice preparing their camp site

Do you know some very nice mice who love to camp?

The little tent is made from this free pattern with some adjustments. Print the pattern at 85% and cut out on the cut line. I did not sew it. It’s just one layer of fabric (a vintage feedsack I’ve been saving for just this sort of occasion). The edges are raw. It took about 5 minutes to make.

The mice are made from another free sewing pattern.

a tiny table for mice set with miss matched mini china

The diy for the little dishes is right here.

The wire bed diy is here and the mini chandelier is here. and some more mouse house details here.

Have your very nice mice had adventures? Let us know in the comments.

merry and bright : last minute christmas trees for me and the mice

mouse house christmas party with make do tree

mouse house christmas party with make do tree

The question of their Christmas tree has been on my mind. What would the Admiral and Mrs. Croft do? Mice borrow and improvise and repurpose. Mice work with what they’ve got. Mice make do. I identify strongly with this.

norfolk pine tree decorated with paper snowflakes

I’m improvising too. I still have not un-storaged my Christmas stuff so I made a last minute tree with what I had and just a little time, some paper and wax paper snowflakes and a few super simple paper garlands. There was a little foil, tinsel and mylar involved too.

And technically there are two Christmas trees (not counting the mice tree). The little Norfolk pine is new this summer and it got a tiny bit decorated too. Pretty festive.

Wishing you a very happy Christmas,
ann

house for a mouse : make mini chandeliers and a bed

mouse house diy projects

doll house diy

Making a cozy house for nice mice: part 2 – the bedroom

If you haven’t checked out Part 1 find it right here.


doll house furniture tutorials

mouse house tutorials

mouse house diy

The Admiral escorts Mrs. Croft off to bed.


doll or fairy bed diy


Of course they need a bedroom too, a cozy escape from the trials of the day.  The tutorial for their dear little wire bed is here.


dollhouse chandelier diy

*some links are affiliate links – meaning I get a tiny commission if you purchase through the links – they are marked with an asterisk

The fancy chandeliers are made from vintage beads and buttons and *24 gauge wire. Any wire small enough to fit through your beads will work. Improvise and work with what you’ve got – that is the spirit of the mouse house. I didn’t have a ton of beads – I gave most of them away a while ago – what was I thinking… So I took apart a couple vintage earrings, found a few glass buttons and beads and some tiny plastic seed beads.

I’ve got some tips below to get you started:

dollhouse chandelier diy

Make a circle of beads on your wire – whatever size you like. Twist 3 or four wires onto the ring – with a short end and a long end.

dollhouse chandelier diy

I used four wires – spaced out pretty evenly around the circle of beads.

dollhouse chandelier diy

Add a bead or button to the short ends and curl them up.

Read More

wire doll bed diy

wire doll bed

wire doll bed tutorial

Maybe you’d like to start a home for tiny foundlings. Or your mouse house needs a bed.
I’ve made you a diy just in case. When I started messing around with this I found the twisting and wrapping wire construction method pretty difficult so I experimented with other ways of fastening wire. I ended up with something that I think is way easier  to do (tape) and I’m super happy with the result. So happy I made a bunch, I am currently even extra obsessed with making things cozy.  And I like their wonky vibe, it’s a big part of their charm,  perfection should not be a goal in this project.

I’ve sized this bed for very nice mice but there are notes for enlarging it a little for the tiny rag doll or mr. socks. It’s a good idea to have socks or the tiny doll nearby while you make it to double check your fit.

wire doll bed tutorial

*This tutorial contains affiliate links – meaning I get a small commission if you purchase through the link – they are marked with an asterisk.

Notes on wire: I used 19 gauge galvanized wire in the demo – it’s pretty stiff. The easiest wire to use is this soft annealed *19 gauge black wire. If you have something else on hand give it a try. As long as it bends easily and holds it’s shape it should work.

Notes on tape: Masking tape and *floral tape both work. I made the demo with masking tape since it’s likely you have some of that. The floral tape makes a more invisible join but after making a whole bunch I prefer the masking tape functionally and aesthetically.

wire doll bed tutorial

Before we start putting the bed together let’s talk about finishing. Because I use  tape as the fastener I painted the whole bed. Both the galvanized wire and the softer black wire took the paint (acrylic craft paint) well. I recommend using darker colors or black.

And of course you’ll need a mattress and pillow. It’s super easy and you can sew by hand or machine.

download the mattress and pillow patterns

You’ll also need scraps of fabric a basic sewing kit and something to stuff with. Anything is fine – even toilet paper…

*If you opt to make a larger bed for the tiny rag doll add 2 and 1/2 inches to the length of the mattress template.

Cut out the mattress and pillow fabric and pin with the right sides of the fabric together.

Sew the seams leaving a small section open for turning.

Clip of the corners, turn the mattress and pillow right side out, stuff lightly and then stitch the openings closed.

The template includes a pillow case and you can find instructions for that right here.

make a wire doll bed

materials and tools:

needle nose pliers and wire cutters

19 gauge wire – this soft annealed is easy to work with

masking  tape or *floral tape – see the notes above

craft paint and brushes

wire doll house furniture tutorial

1. Cut all your wire pieces:

  • 2- 18 inch
  • 1- 10 inch
  • 2- 6 inch
  • 1- 10 and 1/2 inch
  • 1-  8 and 1/2 inch

If you would like to make a larger bed for miss thistle make the long pieces 20 and 1/2 inches instead of 18. Also cut an extra 10 inch piece.


2. Bend the 10 and 1/2 inch and  8 and 1/2 inch pieces into U shapes.

3. Bend each of the 6 inch pieces as shown – 1 and 1/2 inch from each end.

4. Bend the 10 inch piece into a rectangle with the ends overlapping (for the larger tiny rag doll bed make 2 of these).

5. All your ready to assemble parts should look like this.

Read More

make a house for a mouse

make a mouse dollhouse

mouse doll house

A fancy dress tea party for very nice mice!

They are so happy to see you! Come right in!

Step into their warm, welcoming ramshackle room. I could totally live there! They’ve made it extra festive and cozy for a fancy tea party with friends.

Find part 2 – a cozy bedroom right here.

mouse doll house tea party

The dear little scene is made from stuff I had around, a couple things from my childhood dollhouse, old french letters on the wall and some favorite tiny treasures. The mice and plates are free tutorials in case you are feeling the need for a mouse tea party. I’ve shared a few tips and ideas below for creating a very nice mouse house including miniature plate hangers for your tiny mismatched china, more on that in a minute.

make a mouse dollhouse

mouse tea party

Making a mouse tea party was not my plan for Saturday.  All of a sudden I felt the need to make something entirely for Joy. 100% JOY.  And it was, sorting through my treasures, making the wire chandelier, putting together the little scene and photographing it was 100 % joy.

mouse doll house door

mouse house diy

some details:

*some links are affiliate links – meaning I get a tiny commission if you purchase through the links – they are marked with an asterisk

A fancy bicorne hat for the host -The tiny bicorne hat was made using this pattern but I used the “bird bicorne accent” pattern piece for the hat and then cut another a little smaller for the decorative piece.

The mice – made from the very nice mice  free pattern – pro tip – lately I’ve been adding walnut shells or a coin or two for weight in the bottom to help them stand up.

Tiny plates and cups made from this free tutorial – so much fun.

pickling spice for mini mouse food

mouse food – Pickling spice makes great mouse food. I put some in a little glass button and sprinkled some by the door mat too – little mouse debris, you know how mice are…

miniature chandelier

Chandelier – Its made from this *super handy 24 gauge wire, a vintage earring I’ve had for ever and a few tiny beads. The easy plate hangers are made from this wire too.

make miniature plate hangers

make miniature plates and plate hangers for a dollhouse

Cut a few inches of  *24 gauge wire. You will also need needle nose pliers – small ones are great, wire cutters and pins for hanging. I used the sharpie to color the *little applique pins. The little pins come in handy for lots of dollhouse things.

Bend the wire in half and make a loop. Twist the ends under the loop,

Place your tiny plate on  and bend up the ends.

Remove the plate, trim the ends and curl them with the pliers.

Put your plate on and press the curled ends to hold the plate snuggly.

make miniature plates and plate hangers for a dollhouse

The wall is made from foam-core and I push the little pins (colored with a sharpie) in to hold the hangers. You can use tiny nails too.

If you’ve got kids home from school this would be a fun project and stay tuned for more ideas. If you do make a mouse tea party I’d love to see – you can email photos to info at ann wood handmade dot com or use #annwoodpattern and #mousehousediy to share on instagram.

Wishing you all health and  peace and happiness and I hope this all passes quickly.

Onward!
ann

the somewhat weekly newsletter

Do you get my free weekly-ish newsletter? There are tips and tricks, ideas, stuff to try, all the latest news and blogposts and extra stuff, just for subscribers, delivered mostly on Friday. Pretty much.


make a miniature stone hearth : the miss thistle society

making a miniature fire[lace form egg cartons

Penelope T. Littles

She has been speaking to me for a long time. Little whispers of her origins, her tidy house, her hearty ancestors.  This is what I know about Miss Thistle.

I’m sure she cooks on an open hearth and has a cozy spot by a window for sewing and correspondence and daydreams and tea.

Thistle P. Littles, Green Valley. Morning, Mountain Shadow

She tends a medium size garden and keeps chickens and goats and bees. And she has sweet miss-matched china – passed from aunts and grandmothers and friends.

My way into Miss Thistle’s world is the hearth. Your tiny rag doll might need a hearth too.

miniature stone hearth tutorial

It’s not hard to make. And before we dive into how I want to tell you about the next Miss Thistle Society project: her mismatched china. I have a trick that makes it pretty easy and spectacularly fun to make her tiny hand-me-down plates and cups. Look for that next week.

doll house plates

paper clayYou probably have most of the things you need for her dishes, except maybe the clay. I use paper clay – this is my brand and you can get it here  (The Miss Thistle Society gets a tiny commission if you purchase through this link).  I use it for lots of things but I always buy the small size because it does not store well after opening.

To make the hearth you will need:

  • paper egg cartons
  • light cardboard
  • elmer’s glue
  • mat board (or a thick cardboard (not corrugated)
  • exacto knife and scissors
  • masking tape
  • spackle (  Find it at any hardware store – I like Fast ‘n Final Lightweight Spackling)
  • craft paint
  • brushes – a variety of sizes
  • toothbrush
  • a sponge and a soft rag
  • fine sand paper

And you will need a hearth. A shape to work on.  I made my shape out of foam core and mat board. It’s assembled with hot glue mostly. So many burns…  And I made a giant hearth – you don’t need to. A small one is sweet and quick to make.

This tutorial is concerned with making the stone finish but I will offer a couple tips on making your foundation shape.

make the hearth opening

The easiest thing to do is start with a box (a sturdy corrugated box).  The box above is about 6 X 9 inches and 1 and 3/4 inch deep.  Mark the opening and use your exacto knife to cut all the way through the lines marked in red and score (just cut the surface of the cardboard) the lines marked white.  Fold back the sides to make the inside walls of the hearth.  Glue the hearth walls in place and cover the scored areas and edges with making tape.

If you make your own shaped foam core is great  – choose white or black.

Whether you build the shape or use a box, re-enforce  the corners (inside) with little triangles of mat board glued in. A few in each corner will make everything stable and sturdy.

I’m demonstrating the stone texture on my huge hearth. Cut shapes from grey cardboard and tear shapes from a grey paper egg carton (the flat parts) to create a little variety in texture and edges. Glue them to your structure with elmer’s glue.  I made my structure out of black so you could see but it does not matter – white grey or brown is fine.

cardboadr stone hearth

Cover the entire structure (I left a small section of my hearth un-stoned because I have a wood mantle I want to add). Let the stones dry in place.  Read More

bundling up the tiny doll folk and imagining their world

embroidered felt doll hats and jackets

embroidered felt doll hats and jackets

When faced with a stressful situation small sewing is good medicine. This weekend we made some big tech improvements to ann wood handmade that were sort of terrifying. I’m thrilled with the result – especially the speed.

embroidered doll cap

While all the scary work was being done I lingered in the details of tiny felt jackets and hats and slow stitched talismans. Besides needing to distract myself from the website work it has been cold and snowy, all the more reason for cosy hand sewing and bundling the little dolls up. I sure do love to bundle things up.

small stitch experiments

embroidered felt doll jacket

tiny rag doll that fits in the palm of your hand

Find the free little jacket pattern here and the tiny doll hat here.

The folky little winter ensembles make me curious about tiny doll world, the details and history. I’m going to investigate that over the next few weeks. You may recall I explored the world of a family of cosmopolitan ants a couple years ago.

beaumonts christmas

ant family christmas

It was probably the most fun I ever had. I’m looking forward to imagining a world for the tiny doll folk. Stay tuned.

dioramas at squam

diorama detail

If you visit here often you know that June was mostly a traveling and teaching month for me beginning with a diorama class at Squam. It’s a fun class to teach and I always learn a bunch too, in preparing as well as the class experience. There is always magic in that class. The magic in people who show up for it and experiment, magic in that forest, and always in that gathering.

play house gathering at squam

It continues to be one of my most favorite places.  Elizabeth Duvivier invented Squam and she invented me as a teacher.  She was willing to give it a shot so I was too. Teaching continues to change and expand me like nothing else. The students this spring experimented and stretched, were open and willing and supported each other, I loved being part of it.

charming assemblage figure

diorama detail - antique bottle with lichen

squam diorama figure

diorama detail

Gathering things for this class is an adventure and I love having permission to roam around and acquire lots of lovely old things to share. Things I feel some spirit in. And there is also so much to find in that giant oak forest.  After class I like to wander around and look for the intersection of real and make believe that intrigues me so much.

tiny rag doll in the forest

a little hand stitched toadstool in a big forest

P S – I’ll be back at Squam this fall and I’m in the planning stages for 2019 workshops now and will be headed South for the first time. I’m rolling ideas around for that – what would you like Southern friends?

making small worlds

miniature flagstone fireplace

Where do you lose yourself? For me it is often in tiny worlds. I pay attention when time disappears. I think it means a deeper connection is happening. Something is flowing and I’m letting it, I’ve achieved real presence and there is no struggle or distraction, nothing else tugs at me. I unclench. Unclenched is a good place to be.

ant world

Last year I created a tiny world inhabited by ants, ants with a taste for mid century furniture. I lost myself completely in the process in the very best way. It woke me up early and kept me up late. I was enchanted and mesmerized by the world as it took shape and deeply engaged in the craft, the process of creating it.

miniature flagstone fireplace

The centerpiece was a fireplace made from cardboard and foam core. I cut flagstone shapes from chipboard and glued them to the structure. The whole thing was covered with spackle (3m – patch plus primer is a great one) sanded, and painted.

cardboard flagstone

dusting : fortuny ants

The furniture was a trial and error process with help from this website, there are lots of good tutorials and techniques for building miniature furniture mostly from cardboard. I made the credenza above from cardboard, coffee stirrers, balsa wood and chopsticks.

I love exploring little worlds and objects I did not create too, bumping into them in the big world. I came across this miniature village in the back of a huge antique place upstate.

miniature village

Something about mini speaks to me and always has, especially everyday things presented in detail at a small scale, even more so when it is a working thing like this little oil lamp.

miss petunia's lazy day

tiny underthings

There are other small worlds for me to create and it is one of the things I’m focusing on this year. Something I think a lot about but have not made time for. I want to explore and articulate the world the tiny ragdolls inhabit and follow Mr. Socks up the crooked road to Woebegone Pines and the big black house where the whole Socks family has lived for many generations of mischievous cats.

mr. socks takes a stroll